
My Personal Guide to All the Best Features in Nicepage - Part 3
This is my third article in a four-part series about my favorite web builder, Nicepage. In the first article, "My Personal Guide to All the Best Features in Nicepage, Part 1," we discussed the Nicepage subscription plans. We also mentioned its desktop app for Windows and Mac allows you to design and edit your website offline. Then, in my second article, "My Personal Guide to The Best Features in Nicepage Part 2," I highlighted special design features in Nicepage that I especially like. Some are even unique to Nicepage.
In this third article, we will discuss the options available on Nicepage, allowing you to publish your site to your website from the desktop app.
Publication Options
I have provided screenshots to help you visualize the comments, but there is also a video further down you can view.
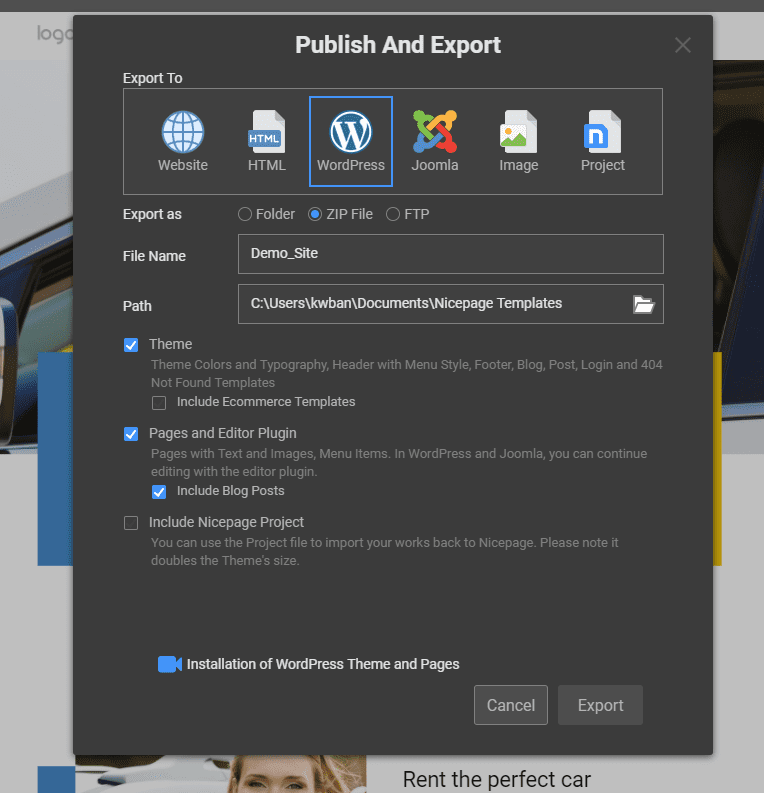 Nicepage Publishing Options
So let's go to the desktop app for Nicepage. In this case, it is in Windows, but there is also a version for Mac computers. The website showing on the desktop is one I have been working on in the second video for demonstration purposes. We demonstrated some animation, grids, and how they contribute to a responsive website. We also presented a modal, accordion, and tab feature.
Assuming that we are ready to publish our website on the internet, let's look at our publication options. These methods export the site from our desktop app to our online website. So we go to the publication feature, where you can see the following options:
- Website. This option uploads the site directly to the Nicepage server. This is a simple way to post the site online and allow clients to view it before launching it publicly.- HTML. For those who prefer a simple, straightforward website rather than a CMS such as WordPress or Joomla.- WordPress. This is the most popular website option, and Nicepage is a leading theme builder for WordPress.- Joomla. Though less popular than WordPress, Joomla offers another CMS option.- Image. Publish a one-page image of the site.- Website project. This packages the website project for transfer to another computer.Website Publication
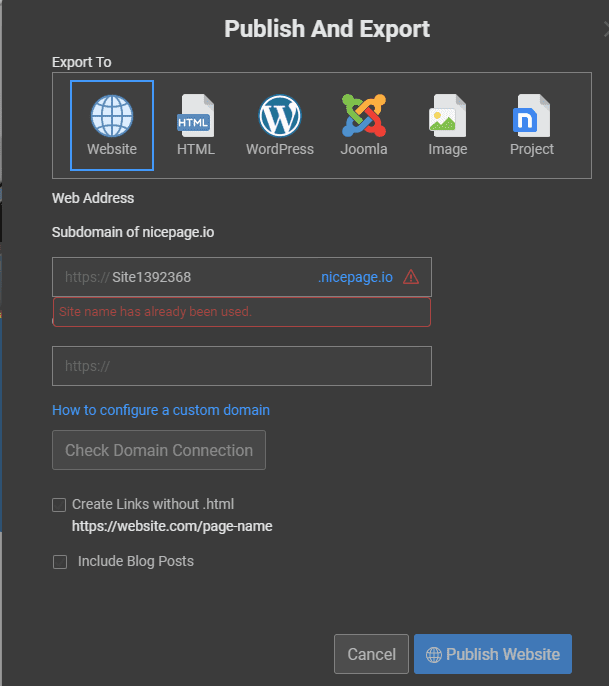 Website Publish option
Starting with the first option, we will publish to a website. The subdomain to which it will be posted is shown in the window. Use this URL to view the site once it's published. A custom domain name that you have registered can also be configured to direct viewers to the Nicepage subdomain. A few other options can also be selected in the window, but we will skip them and go straight to "Publish Website."
Now we can use the subdomain URL to view the site. As you scroll down the home page, you can observe the animation in action with the various page elements as they zoom out or slide in. Click on the button for the modal to have it pop up with the photo slider. And then, you can see how the accordion and tab look and operate. Both are good options for offering viewers an opportunity to view the data or not.
HTML Publication
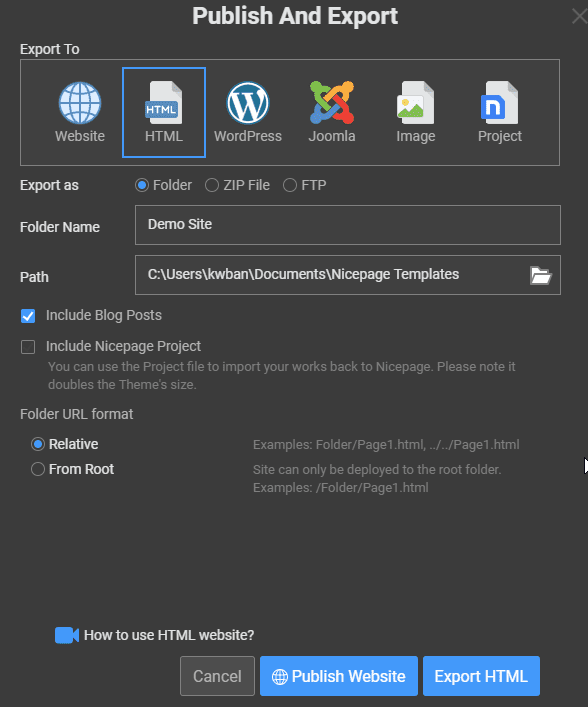 HTML Publish option
With the option to publish to HTML, we can export the site to a folder, a zip file, or directly to our website using FTP. I use my FTP client, so I take the Folder option and select where to export it.
I will go over to Filezilla, connect to the export folder, and then to my website folder online. I will select all files and folders in the export folder, then drag and drop them into the online folder on my hosting site.
There is no further configuration necessary. I can go to my browser, enter the URL of my website, and immediately view the site. This assumes that my domain is set up with the hosting site and has propagated across the internet.
WordPress Publication
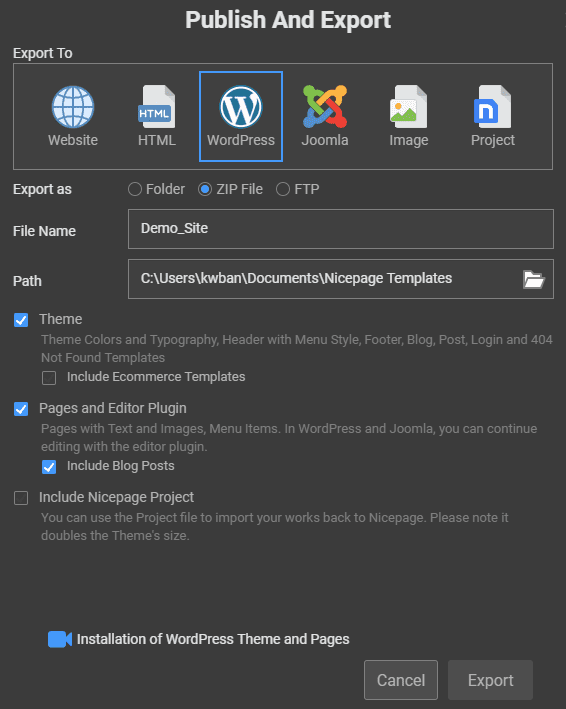
Finally, we will choose the WordPress option for publishing. Again, we can export to a folder, zip file, or FTP. Selecting the zip file option is the most straightforward choice. You will need a more advanced understanding of WordPress to use the folder or FTP approach.
By choosing to export to a zip file, I will install the site on my WordPress website as with any other theme. The only difference will be the import of content and installation of a plugin. The Nicepage plugin will serve as your editor in WordPress to work with your Nicepage web pages.
Before exporting the WordPress zip file, choose which features you want to export to your website. You will want to include the Theme along with pages and Editor Plugin. If you are planning an eCommerce site, retain the templates. If you want to export your site to the desktop app, choose to have the Nicepage Project. Now we are ready to export.
Next, we will go to the wp-admin section of our WordPress website to install the zip file. Once you are in the wp-admin area, select "Appearance" from the left menu and select themes. At the top of the page, click on "add new" and then on "upload theme." You will locate the exported zip file on your computer and click "install."
Now that we have installed our website, we need to activate it. Having done that, click on customize, and you will need to go to self-identity. In this section, you will insert your logo and Favicon from your media library or upload them from your computer. Then go further down to insert the site icon.
Now click the back arrow, then go down to the menus. Under menus, you will need to select the menu you will be using. Most likely, it will already be set.
Next, click the back arrow and go to "Homepage settings." Here you will choose whether the homepage will use the latest post or will be a static page. Although posting is a significant function of my Digital Chowder website, I use a static homepage with links to posts.
At this point, you're ready to click publish and view your WordPress website online.
In my fourth and final Nicepage-oriented article, I will discuss working with your Nicepage-generated website within WordPress. In addition, I will show how to go back and forth between your online and offline versions of the site. You can view all four articles on YouTube for a better visual demonstration of this presentation.
Website Building and Repair
 Elite Web Presence
Do you find all this a bit overwhelming, or do you not have the time to work with a site? Let me make a suggestion. Go over to Elite Web Presence for some help. Whether you need a complete website build and update, or some cleanup and maintenance, they can do the job for you. They can also help with SEO, along with website backup and security.
Conclusion
Has this series been helpful? Building a website with Nicepage is an easy and efficient way to get your site up and running quickly. Using the tools it offers, you can create an attractive design that drives traffic to your pages and gives customers what they need.
Finally, does all of this sound too daunting or time-consuming? In that case, Elite Web Presence can help build, update or maintain your website to optimize it for success.
Have questions or comments? Please leave them in the comment section below.
Top Posts
As an affiliate marketer, Digital Chowder earns from qualifying purchases.
https://digitalchowder.com/guide-to-all-the-best-features-in-nicepage-part-3/

No comments:
Post a Comment