Wednesday, October 25, 2023

Elementor vs. NicePage: Which Is Better for WordPress Websites?

Elementor vs. NicePage: Which Is Better for WordPress Websites?


Which Is Better for WordPress Websites - Elementor or NicePage?


WordPress has two excellent drag-and-drop page builder plugins for WordPress in Elementor and Nicepage. Both have several fantastic features. Both are great picks for creating WordPress sites. So, which one should you use?


As a user of both WordPress builders, I must inform you that I have already decided. That said, I'll go through both objectively and share some reasons why I chose Nicepage. To level the playing field, I will also disclose that I am an affiliate for both Elementor and Nicepage.


So, with disclosures out of the way, we will start by looking at some objective features of both Elementor and Nicepage.


Page Builder VS Theme Designer:


One of the benefits I liked about Nicepage is that it's not only a page builder but also a theme creator. However, on the Elementor website, you'll discover a theme builder feature. So are they able to create WordPress themes as well? The answer is yes, albeit in two very different manners.


Installing a desktop program on either a Windows or Mac computer or an online builder is where Nicepage begins. These are independent applications that aren't connected to your WordPress site. You start by creating your theme using a variety of templates and styles in these apps. Templates are full-page layouts on which you may build your theme's design. The designs inspire the page's block arrangement. Once you have designed a theme, you export it from the program and install it in WordPress, just like any other theme. A plugin is included in the archive file that must also be downloaded and installed in WordPress.


Elementor does everything from within WordPress. Once the plug-in is installed in WordPress, you can build a theme. If you are using a free version, you will need to install the "Hello" theme and use the theme builder tool from within the page builder to modify theme elements, such as the header and footer. A template feature is installed for building a theme if you are using a pro version of Elementor.


Elementor gives this description regarding its theme builder:
"'Builder' might be a confusing word in this case, but historically, it has become a standard part of the design vocabulary. Just as page builders are page designers that work in conjunction with your theme, the Elementor Theme Builder is a tool for building a new design framework that changes the look of those areas of your theme that have traditionally been off-limits to page builders."


Website Designs:


Another advantage of Nicepage is that it is more than a WordPress theme designer and page builder. The themes created with its desktop or online applications may not only be exported as WordPress themes but also as Joomla templates. Furthermore, they can be exported as an HTML5 website.


Comparison of Features:


Now let's focus on page building and compare features between Nicepage and Elementor.


Responsive & Mobile Designs

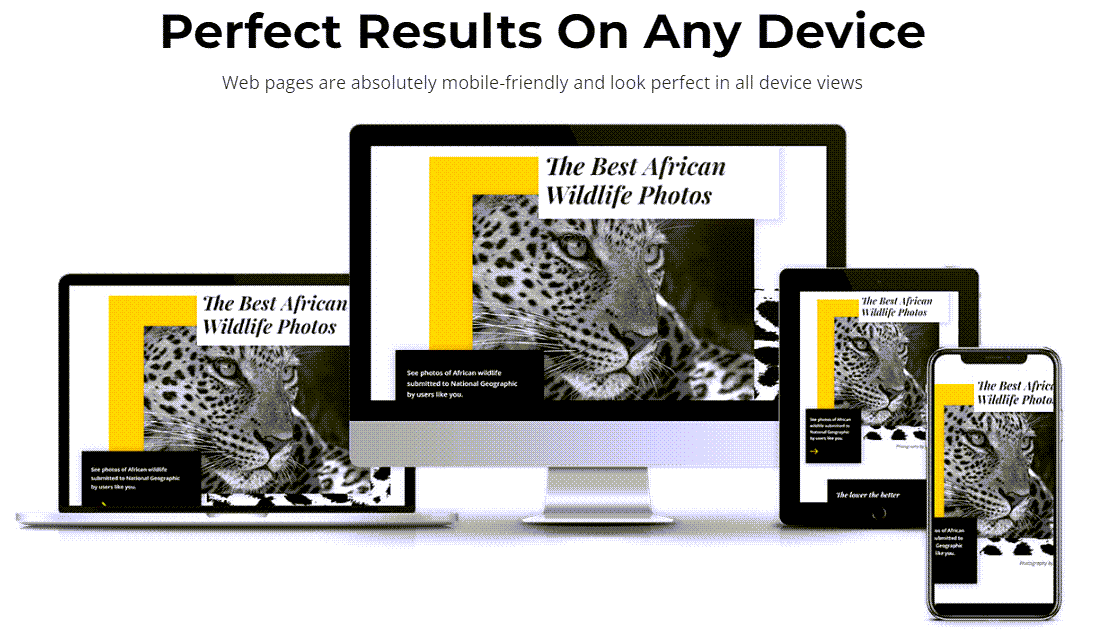
Elementor and Nicepage are both responsive and mobile-friendly. In other words, their designs adapt to any screen size - including mobile displays - and respond quickly. Both provide Desktop, Laptop, Tablet views, and Mobile screens in portrait and landscape mode. Once you've created a desktop version of a page, you may switch to any other screen sizes to see how it appears and make any needed changes. The majority of the time, all that is required is a few modifications to this view, such as repositioning page headers on the page or centering images. Elementor and Nicepage are equally capable in this area.



hosting solution ad

Todoist

Drag & Drop Editor

Both offer drag-and-drop design capabilities, which is another common feature between them. Find the feature you want from a list in the left column of your design page and drop it on the page layout in either program. You may then freely position and resize the element as desired. In addition, you may easily customize the colors, backgrounds, and other properties to your liking.


(We independently select these products — if you buy from one of our links, we may earn a commission.)


Video Demonstration

Here are two short videos demonstrating their features to give a feel for the differences between the two builders.


If you view both videos, you'll find that the technologies employed are pretty similar. Regarding page creation through drag and drop, both products work similarly. The different ways elements may be positioned and modified within the page blocks influenced my decision to use Nicepage. Elementor's manual handling of position, sizing, and modification tools in the left column can be time-consuming. At the same time, Nicepage's mouse use for all these functions on the design page is more efficient. While this distinction might seem minor, it significantly impacts how quickly you can achieve your desired look and do so without spending hours in front of your computer.


Elements

Nicepage claims over 300-page elements, and while Elementor does not give a number, a browse through available features appears to be very similar. Elements might be broken down into:


- Design elements - These include such elements as Headings, elements for layout, images, text editor, buttons, texts, colors, fonts, etc

- Function elements include forms, menus, sliders, social media integration, etc.

Nicepage


Elementor

Pricing

Both offer a free edition. As you might expect, these free editions have certain restrictions. The limitations affect the number of websites on which you may use your license and specific features. So let's look at them side by side:


Elementor:

- Free Plan - The free version is limited to one website, 50 editor widgets, and no theme building. A few other limitations exist, such as no eCommerce or form builders.

- Essential Plan - For most of those reading along, this version or the free version will be the only version in which you will have any interest. You are not designing multiple websites. Only the one you need for your business. This plan is $49 per year and allows for one website. It comes with 100+ editor widgets as well as the theme builder. It also has more website kits and designer themes available. Plus, it has eCommerce, a popup builder, and a form builder.

- There is also the Expert Plan, the Studio Plan, and the Agency Plan. While there are a few more differences than this, the primary difference is the number of websites with which they can be used.

Nicepage:

- Free Plan- The free starter pack allows you to create the site, export it, and test most options. The number of grids, blocks, colors, etc., is limited in the free version. There is no limit to how long the free version is available.

- Personal Plan - The cost of this plan is $59 per year. This plan gives free updates, five sites, 10,000+ Page and Block designs, 200 block layouts, 25 Grid styles, and 1 Modal Popup.

- Other plans include the Business plan for $129 annually, the Pro plan for $199 a year, and the Ultimate for $349 a year. Each of these plans will increase the number of sites, page & block designs, grid styles, and modal popups. Again, the Personal Plan is sufficient if you are only interested in designing your business site. Should you need more than one site for your business, the Personal Plan will allow this.

Top Elementor DevelopersGet a top Elementor Developer

Conclusion:

Both plugins offer similar functionality, so choosing between them depends on your needs and preferences. If you’re looking for a simple page builder with fewer options, then Elementor might be better for you. However, if you’re looking to build complex pages with many different elements, then NicePage will likely be a better choice. It will excel in giving you:


- The ability to try out your ideas on the fly.

- Allow you to modify elements in minutes.

- web design 3.0 features

- 1,000s of designer web templates

- A responsive design that looks great on any device

Check them out:


Nicepage


Elementor

(We independently select these products — if you buy from one of our links, we may earn a commission.)


Jasper Boss Mode

Additional Resources:

- My Personal Guide to All the Best Features in Nicepage, Part 1

- My Personal Guide to The Best Features in Nicepage Part 2

- My Personal Guide to All the Best Features in Nicepage - Part 3

- Unlocking the Power of Nicepage: My Personal Guide - Part 4
https://digitalchowder.com/elementor-vs-nicepage-which-is-better-for-wordpress-websites/
Sunday, October 22, 2023

What Is A Pad Printer And How Can It Help Your Home Business?

What Is A Pad Printer And How Can It Help Your Home Business?


How Can A Pad Printer Help Your Home Business?


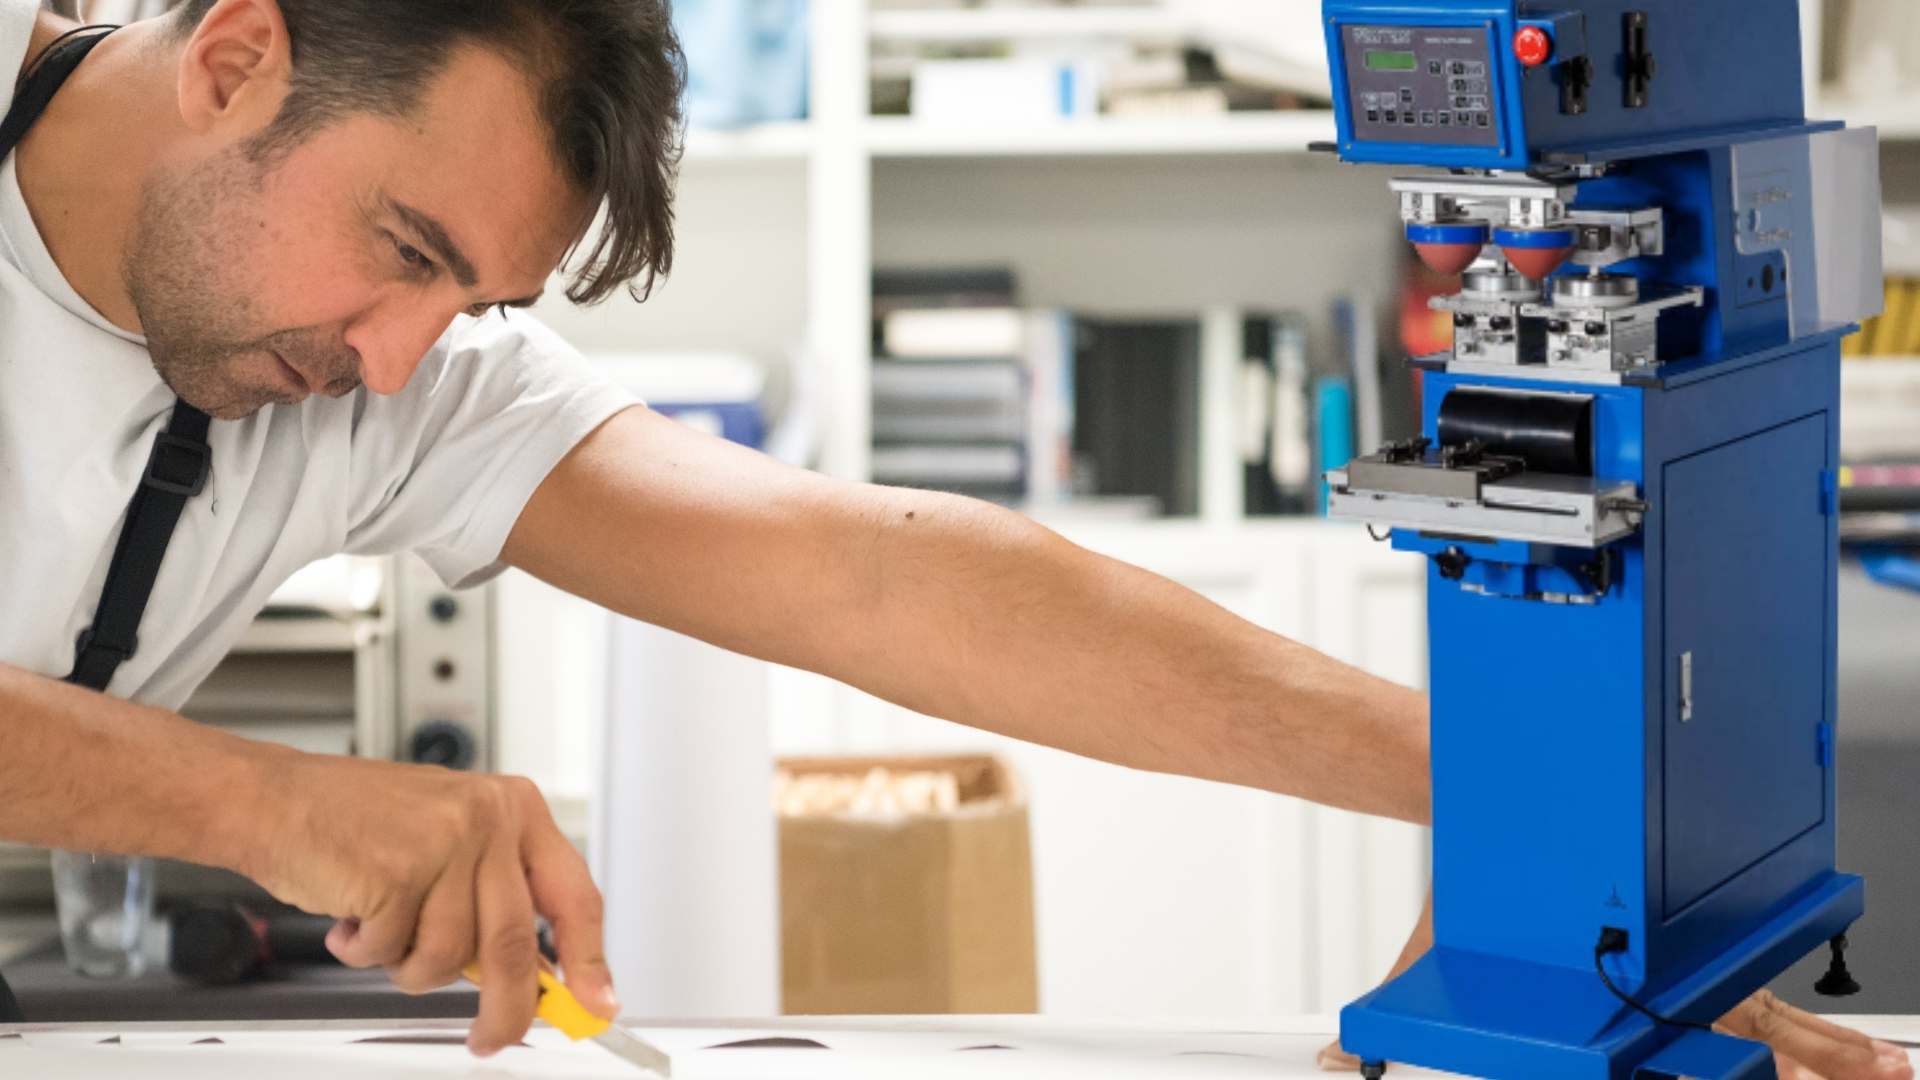
What Is A Pad Printer? If your business transfers two-dimensional images onto three-dimensional objects, that question could interest you. Your quality might be lacking if you use screen printing or another technique rather than pad printing. The pad printer is made specifically for this print job.


But you may also be looking for a way to take your home business to the next level. Pad printing can benefit your existing business but can also be an avenue for diversifying your business or starting a new one.


What Is Pad Printing?


Pad printing is an indirect offset where ink from a laser engraved plate is transferred onto a 3-D object using a silicon pad. Thanks to pad printing, a process once difficult or impossible to complete is now available for customization. With the pad printer, it is possible to print on such materials as:


- Aluminum

- Cellulose acetate

- Ceramics

- Chromium-plated surfaces

- Coated surfaces

- Cotton

- Duroplastics (phenolic and melamine resins, glass-fiber reinforced polyester, and epoxy resins)

- Glass

- Gold-plated surfaces 

- Leather

- Metals

- Nickel-plated surfaces

- Paper

- Plasticized PVC

- Polyester (PES)

- Rubber

- Silicone rubber

- Synthetic leather

- Wood

- and many more

By broadening the types of materials you can print on, you also enlarge the number of doors opening for starting a new business or expanding an already current one. With being able to print on any of the following surfaces, your printing ventures could include:


- 1. Custom coasters

- 2. Ceramics such as mugs, plates, and bowls.

- 2. T-shirts

- 3. Golf balls

- 4. Keychains

- 5. Magnets

- 6. Notepads

- 7. Pens

- 8. Mousepads

- 9. Stickers

- 10. Glassware Decoration

- 11. Metal Signage

- 12. Promotional Items such as pens and buttons

- 13. Product Labeling

- 14. Barcodes

This list is not exhaustive, but it should pique your thinking about the limitless options. These choices might be made available as promotional goods for your company or to sell, or you may contract with other firms to print on products they create or market.


Basics of Pad Printing


How does a pad printer work? 

Three components are necessary for a pad printing machine to deliver a print to an object: the plate, the ink cup, and the pad.


The Plate: The printing plate holds the image you want to engrave on the object. Common ones are plastic – thin metal plates covered using photosensitive plastics. They are known for their flexibility, cheapness, and easy printing. Another type is the steel plate, known for toughness and durability and better suited for large production runs.


The Pad: The mechanism that transfers ink in a pad printing machine is called the printing pad. With the image on the pad, the pad stamps it onto the object.


Pads are silicone, with the type and hardness depending on their purpose. Pads also come in diverse shapes and sizes, determined by the application and artwork.


The Ink Cup: An ink cup is a mechanism that contains the ink printed on a component. The ink cup travels over a plate containing the etch and then returns, leaving only a tiny amount of ink in the etched region.


The ring and cup are the two essential parts of an ink cup. The plate has a ring that slides over the cup to limit ink to locations on the plate consistent with the image. Some manufacturers use ceramic, metal, and plastic rings in their products.


For more details, go to: 


- Step by Step Guide:  https://www.printinginternational.com/story-printing-international/what-is-pad-printing/

- Training & Expert Advice: https://itwtranstech.com/services/training/

Cost of getting started


Suppose you're wondering how much it costs to begin pad printing. In that case, the answer is relative to whether you plan on utilizing it for existing business ventures or starting an independent pad-printing-based business.


Print Projects within your business

With an established business, you may wish to print your company name or logo on goods as a marketing technique. For example, publishing your firm's name and logo on coffee mugs as a giveaway is an option. You may rent a little pad printer for $310 from here. A printer with this price range would come with supplies such as ink, paper, and plates, but not necessarily the printer itself.


Pad Printer Business

There are a variety of print projects that a company may undertake. Therefore, the cost depends on the nature of the job. Other factors contributing to the cost are the size and quantity of the product to be imprinted. To give an example, I'll utilize one case study; you may tailor it to your needs.


This example will use mugs as the product of choice using the Printa Systems ready-made printing system.


The Printa System provides you with the high-quality equipment needed to run your business and the expert training necessary for success. With this particular plan, you are leasing to buy the 990 Series Silver Pad Printer System. The cost of the machine is $3995, with shipping totaling an extra $110—making the total $4105. Your contract stipulates that you pay out this lease at a manageable monthly rate of $138.75 for 48 months. At the end of this period, you will own the equipment.


It is wise to keep it simple and start with a niche market such as mugs. But the equipment you purchase will enable you to branch out and print many other things like water bottles, pens, glasses, cups, and golf balls. You won't need to purchase any extra machinery.


In addition to the equipment, you will also receive training on how to use it. The session covers setup, preparation, artwork, printing, and more topics. This way, even if you have never worked with a printer, you can get started without trouble.


Go to this link to explore the information further.


Other Ideas: This is only one way to secure the printing equipment. However, this example may serve as a guide for the cost and capacity of a pad printery. Furthermore, this method allows you to start without making a significant financial investment.


Go to https://www.printa.com/business-resources/how-to-start-a-mug-printing-business for more information about the printa system.


Ideas For Identifying Business Clients


After you've decided to start your own pad printing company and have acquired your equipment, you will now need print jobs. Enlisting jobs may be the most challenging part of launching a print shop business for you. Where can you locate customers, and how will you entice them?


Individual Customers

If you operate a home-based business, realize that foot traffic will not contribute to your success as it would for a store-front operation. Your primary customers deliberately seek out your products or services online or through word of mouth.


Any mode of advertisement or promotion (aside from a street-level sighting) places you on equal footing with the store-front business owner. Those ads can easily direct customers to your website, make a phone call, or send an email inquiry.


Business Clients

You're not limited to only finding individuals as customers; business clients are another great option. If you pad print any products, find businesses that make and sell those same items so they can use your service for imprinting purposes.


Teaming up with this type of business can make sense financially because you would print more items and get stable work. In other words, having just a few contracts like this could be all your company needs to do well. Once established, you can increase your production with more of the same printing or start imprinting onto different products--or both! This way, your printing volume will go up, along with how much money you're making.


Here are some reasons why choosing a B2B approach to identifying print jobs might be wise. These ideas come from the article, "Why B2B is a Better Choice for a Print Shop Franchise," published by Signarama Franchise.


Conclusion


To summarize, pad printers can be highly beneficial to home business owners:


Business projects can help you create professional-looking marketing materials and personalized gifts and save money on commercial printing services.


Start a new business: Starting a pad printing business can be a great way to earn extra income from home. Anyone can get started in this rewarding field with a small investment in equipment and supplies! 


Please share your thoughts or experiences in the comment section below. What would you like me to write about? Contact me at: wayne@digitalchowder.com


https://digitalchowder.com/what-is-a-pad-printer-and-how-can-it-help-your-home-business/

Friday, October 20, 2023

3 Best Free Invoicing Apps for Sole Proprietors in 2022

3 Best Free Invoicing Apps for Sole Proprietors in 2022


Free Invoicing Apps for Sole Proprietors


Why An Invoicing App


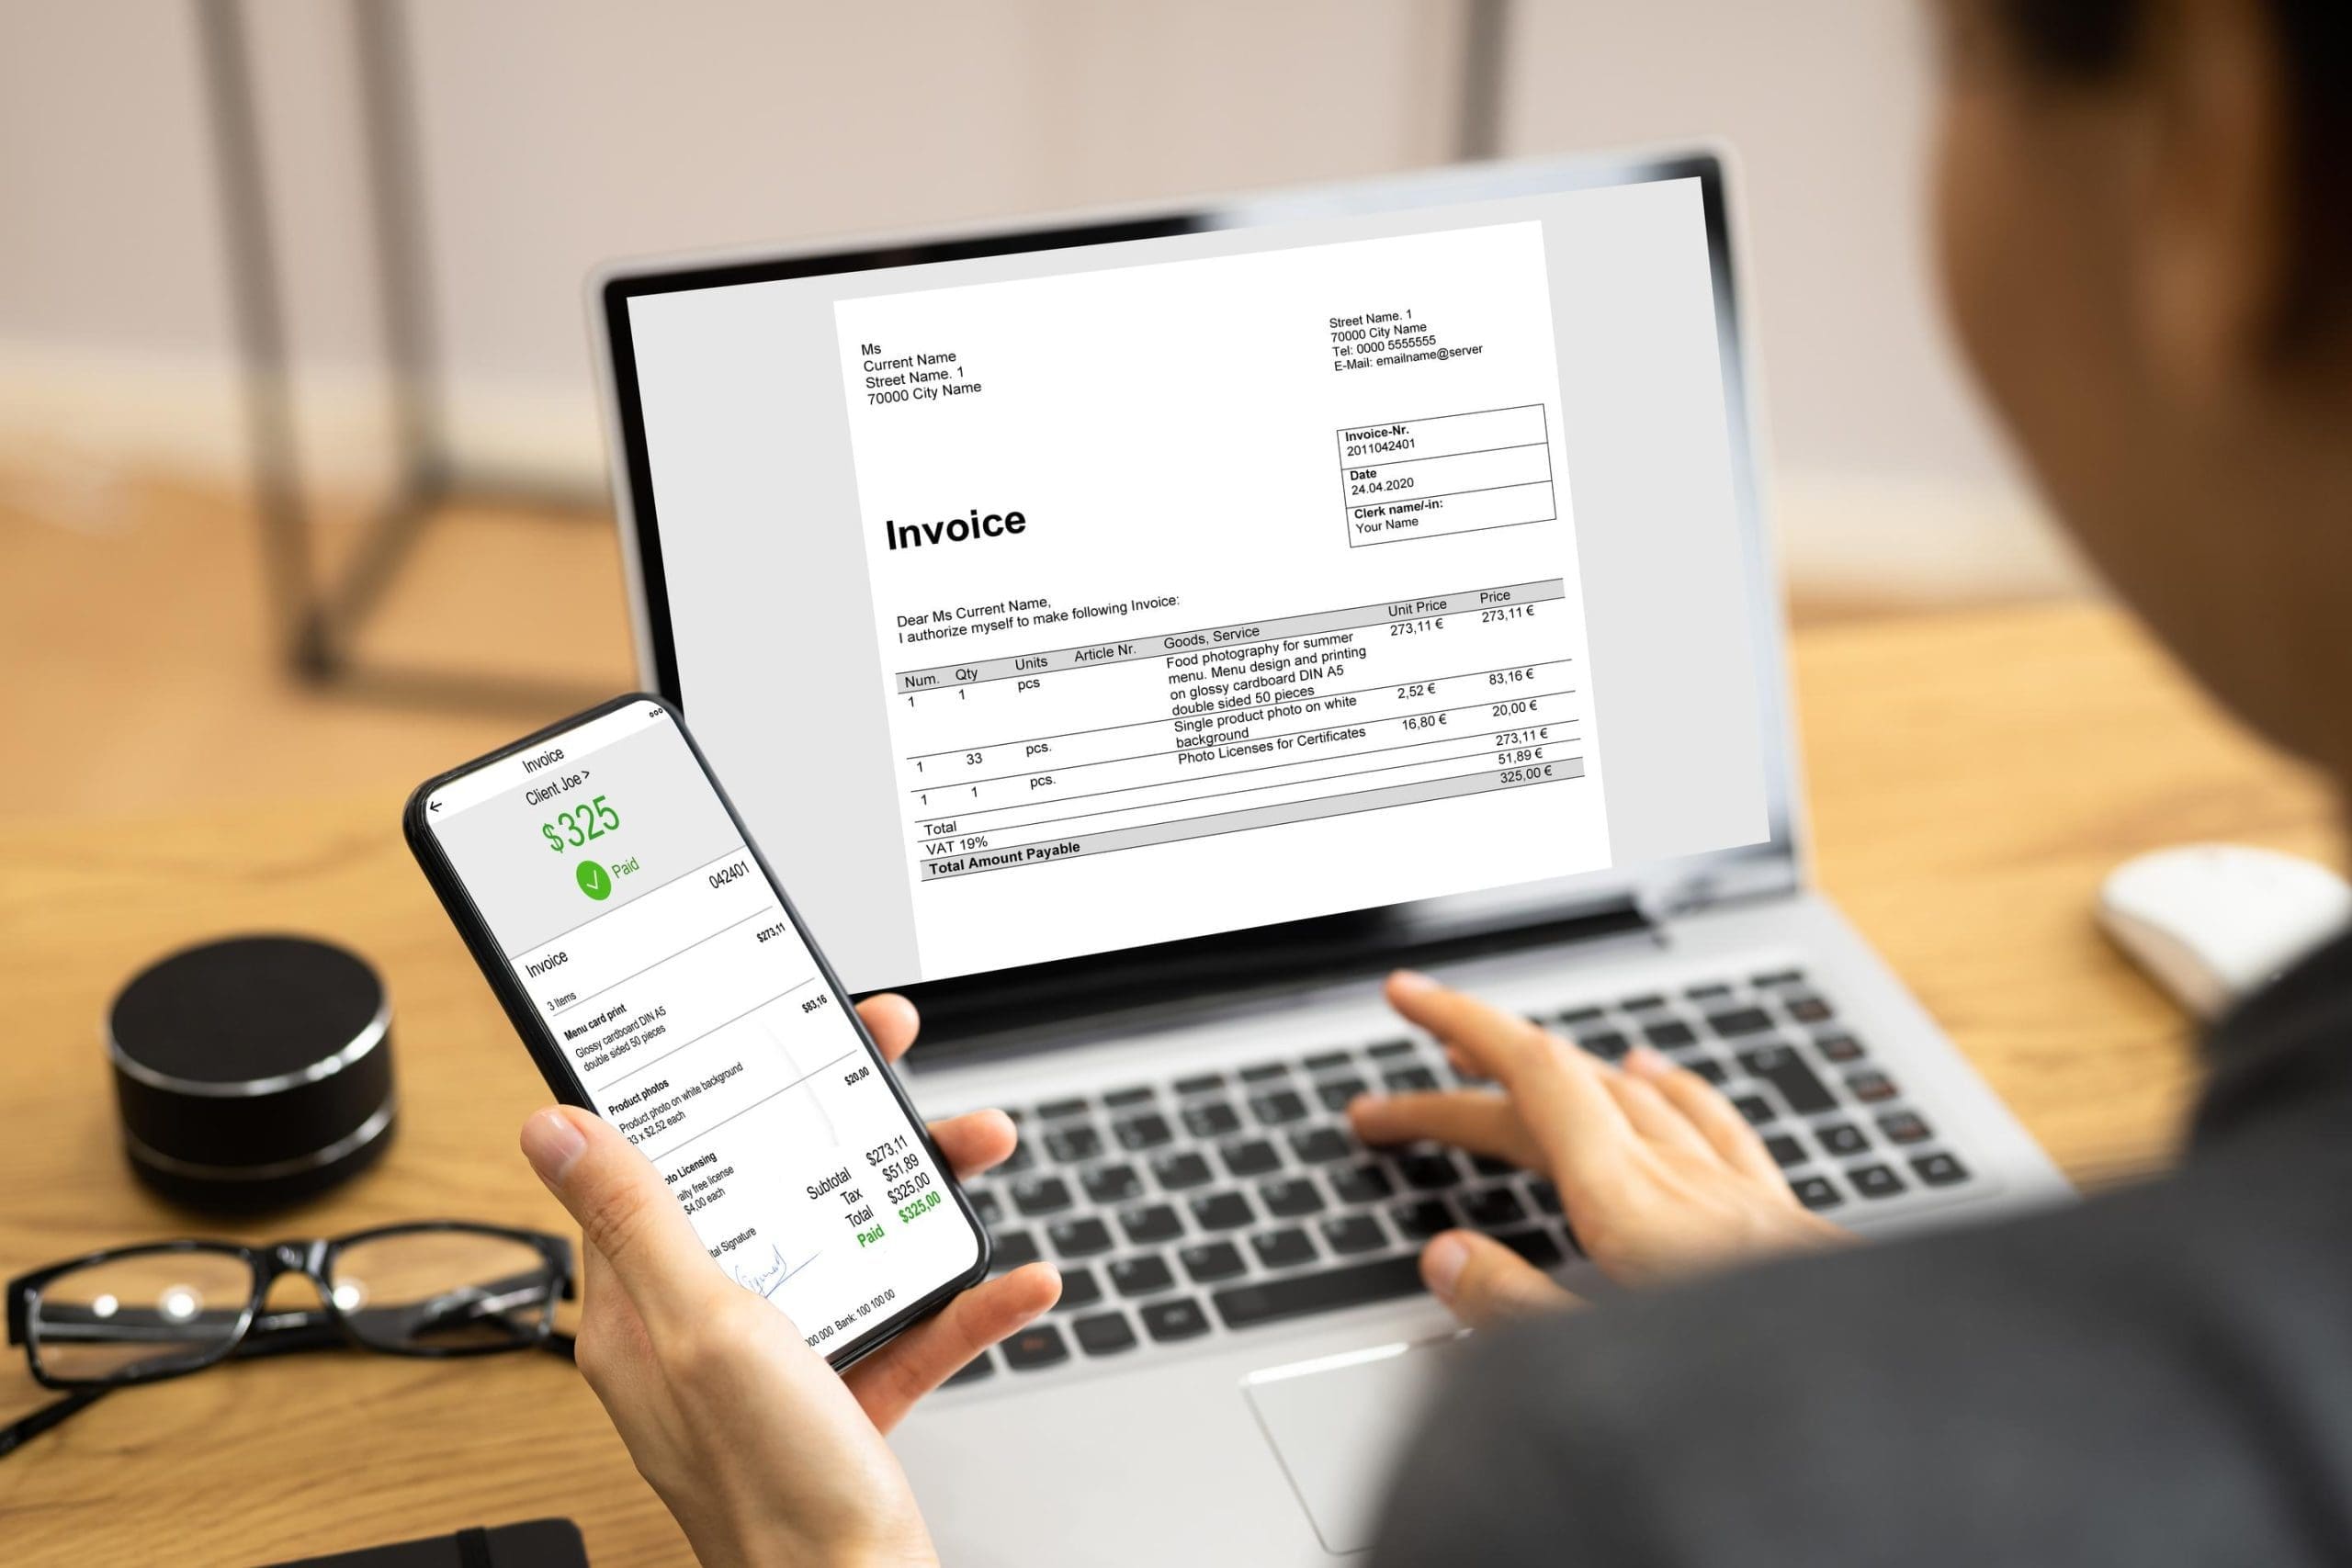
If you're a sole proprietor, chances are you're always on the go, and your time is precious. An invoicing app can help save you time and make sure you're paid promptly by automating the invoicing process. With an invoicing app, you can create and send invoices directly from your phone or computer. In addition, many invoicing apps allow you to track payments so you can see at a glance who owes you money and when the payments are due. This can significantly help you stay organized and on top of your finances. Another significant advantage of using an invoicing app is that it allows you to get paid via credit card or PayPal, which can be a big plus if your clients prefer those payment methods. So if you're looking for a way to streamline your billing process and get paid faster, an invoicing app is worth considering.


Finding a FREE invoicing app is even better. Getting the help of an invoicing app doesn't need to break your budget. You don't need all the features of a more significant business, so why pay for them? This blog will recommend three of the best free invoicing apps for your home business.


Wave


Wave Website


Wave is a free invoicing app that allows you to create and send clean, professional-looking documents for no cost whatsoever. It also includes handy features like tracking payments or managing expenses, so your finances stay on top! Choose Wave for invoicing and add needed features such as accounting and banking. They are all 100% free.


Wave makes money when you choose to use its financial services. For instance, you can use Wave invoicing for free. The service costs you nothing if a client pays the invoice through their own channels. However, you can have Wave send the invoice, and the client can choose to pay the invoice using Wave payment services, and Wave receives a percentage of the transaction. The same principle is true of their other services.


Canva

Here is how it breaks down:


- Need to receive payments? It is 2.9% + $.60 per transaction.

- Need payroll services? The cost of $35 per month.

In addition to these services, Wave offers consultation for a fee:


- Need a bookkeeping advisor? The cost is $149 per month.

- You can have an accounting and payroll coach for a one-time fee of $329.

A benefit of taking advantage of these paid services is that it leaves the heavy lifting to Wave. Need to refund a customer? No problem. Wave will take care of it and keep track. Wave's slogan is "Everything you need. Nothing you don't." And that is the approach to their services.


Wave has recently added a banking feature to which I referred above. As with the other services, banking is free. The service tracks business and personal expenses and keeps them separate to simplify tax season. Wave debit card purchases automatically get logged and categorized in the accounting software. Transactions can be tracked with their mobile app.


Wave Website


Zoho


Zoho Website


Zoho is another excellent choice for the sole proprietor. By comparison with Wave, Zoho is a scalable, full-featured accounting app. While it has a free plan, there are limitations to the number of customers or invoices included with the plan. Since we are focusing on free plans, I will compare the Zoho free plan with Wave.


The Zoho free plan includes these features:


- Hosted payment pages

- Multi-currency support

- Integrated with Stripe

- Offline payments

- Client self-service portal

As you move into the paid plans, more features are included. As you scale upward to the more advanced plans, Zoho becomes one of the market's best invoicing and accounting apps. Zoho's free plan cannot compete with Wave as a free app. On the other hand, Wave cannot quite make it with Zoho as an advanced accounting app.


elementor

With Wave, there is no paid plan for invoicing and accounting. Therefore, there are no limits to the number of customers or features between various plans. There is only one plan, and it is free!


Zoho is a good choice for a small or mid-size business with more complex accounting needs.


Zoho Website


ZipBooks


ZipBooks Website


ZipBooks is also designed for the sole proprietor or small business. As a free invoicing and accounting option for the sole proprietor, it fits in a category between Wave and Zoho. Wave is completely free. There are no paid options for invoicing and accounting. On the other hand, I would not rate Zoho as an authentically free choice. Yes, there is a free plan, but there are restrictions. It will accommodate only 20 customers. It limits the free service to very small businesses and calculates small using a metric based on the number of customers.


Wave also targets small businesses but uses a different metric for small. Rather than measuring by the number of customers, it calculates based on the complexity of the business accounting needs.


So what about ZipBooks? Its free plan includes:


- Sending unlimited invoices

- Managing unlimited vendors & customers

- Accepting digital payments (Square or PayPal)

- Viewing Basic Reports

- Connecting one bank account

ezyCollect

This is a similar approach to Wave. Again, the metric is based on accounting features rather than customers. The ZipBook philosophy is, "From accepting your first transaction to operating a high-revenue operation, we have a plan that covers you (yes, it starts at free)!" So as a new business, you start free. As your business grows, upgrade to the plan that best fits your needs. But since the features offered in the free plan are unlimited, nothing is added to these features in the paid plans. With the paid plans, you will have included things like automation, the number of bank accounts, and the number of team members. For instance, check this list of features included in the Smarter Plan:


- Schedule recurring invoices with auto-bill

- Automate reminders

- Save invoice line items

- Connect multiple bank accounts

- Receive account notifications

- Track time

- Add 5 team members

ZipBooks Website


Which App Is Best


The plan that is best for you is just that - the plan that is best for you. Saying one app is better than another can only be judged based on whether it best suits your needs, regardless of how many great features it has. I have already given a clue to an approach to deciding which invoicing app to choose. Now I will go into it in more detail.


Greatest Need -- Is your greatest need invoicing, bookkeeping, payroll, or something else? If your business sells products, bookkeeping may be the most significant need rather than invoicing or payroll. If, on the other hand, you provide client services, invoicing is probably your greatest need. So start there. If invoicing is your greatest need, then the number of customers or clients you have is also essential. You don't want an app that restricts your number of customers.


If customers and invoicing are not your most significant concern, pick those issues that are of greatest concern. Maybe you need more complex accounting or want to accept payments on your website? Whatever it is, laser focus on your most significant concern or need. Having found the plan that best addresses that concern, now consider some more minor concerns. Does the app that best addresses your most significant concern also address this minor concern? If not, is that a game changer? If so, your next option is to accept a compromise with your more significant concern issue. Or, it may be that none of these three apps best addresses your need.


While your business may be small, your financial concerns may be mid-size business issues. You may need to go looking for apps better suited for the mid-size business.


Todoist

Small Business Financial Tips


I hope this blog has helped you decide on a free invoice app for your business. Here are a couple of additional tips to help keep up with your business financials.


Tips for Getting Paid On Time With An Invoice

Tips for getting paid on time with an invoice
Invoicing can be frustrating, such as sending out countless payment reminder emails, making numerous phone calls, and still not getting paid on time. Fortunately, you can do a few things to increase your chances of getting paid promptly. First, be clear about your payment terms from the start. Make sure you discuss payment options and timelines with your client before starting work. Second, use an invoicing system that allows you to track payments and automatically send reminders. Finally, follow up with a phone call or email a week after your invoice is due. By taking these simple steps, you can decrease the chances of getting stiffed on a bill.


Why tracking income is essential for sole proprietors

Tracking your income is not an activity you can take lightly. It is what keeps you in business. Besides helping you stay organized and on top of your finances, you will know how much money you bring in each month. With this information, you can better budget and keep up with your cash flow. This will also be incredibly helpful in deciding how to grow your business. Plus, it will help you spot potential problems before they become too serious.


Conclusion


So, there you have it. Our list of three best free invoicing apps and tips on ensuring you get paid for all that hard work. Whether you use one of the apps we’ve mentioned or choose a different option, remember to keep your invoices clear and concise, follow up if needed, and always be professional. With a little organization and a solid payment system, you can focus on what you do best—running your business!


https://digitalchowder.com/3-best-free-invoicing-apps-for-sole-proprietors-in-2022/

Unlocking the Power of Nicepage: My Personal Guide - Part 4

Unlocking the Power of Nicepage: My Personal Guide - Part 4
Nicepage wordpress theme builder

Unlocking the Power of Nicepage


This article is my final installment in a four-part series about one of the best web builders: Nicepage. It's not an instructional set of videos. Still, instead, I'm focusing on some of the fantastic features that make this builder a standout for me.


- In video number one, I discuss why NICE pages, subscription plans, and the accompanying desktop app are so effective in helping you design both offline and online. It's one of the features that has made it my go-to choice for all my web development projects.

- In video two, you'll witness the fantastic design features that Nice Page offers, many of which are exclusive to this platform.

- Then in the previous video, I presented the diverse publishing choices that come with a Nicepage desktop app. These include WordPress, HTML, and Joomla. Publishing directly to the Nicepage servers is another choice.

- In this final video, we'll be exploring Nicepage within WordPress. I will show you how to use the plugin that comes with it to get your website up and running in no time. And as a bonus, I'll also share tips on customizing your site online and offline. So let's get started.

Installing the Nicepage Theme


In the last video, I demonstrated the installation of the Nicepage website design in WordPress that I created in the desktop app. I installed it the same way as any other WordPress theme.


We exported the website design to a WordPress zip file from the desktop app. Then, going to WordPress, we select "Appearance" in the menu and "Themes." We then click on "Add New" followed by clicking on "Upload Theme." We locate and install the zip file we exported from our desktop app. Once installed, we need to activate our theme and customize it. Now, notice in the main menu on the left the addition of the Nicepage plugin.


Using Nicepage Editor


Now, let's go to "Pages" from the main menu. Hover over the page you want to edit and click "Edit with Nicepage."


The first thing I want to point out in the editor is that you can do everything within the page editor without leaving it, including:


- Switching to another page

- Creating a new page

- Editing the menu

The image's arrows indicate "Pages" and "Menu Items." I can do it all right here.


Also, if you don't use an SEO plugin, you can add meta information from the page editor. Notice the image highlighting page settings. I decided to use SEO plugins because they have additional features not included with Nicepage.


You can view all these features demonstrated in the video further down the page.


Browser View of Page


In the second video, I demonstrated several design features in Nicepage. With the page loaded in the browser, we can view those features.


- Animation View the video and notice the animation in the first two blocks of the page. Trigger these instances by scrolling. Animation can also be triggered by hovering. In either case, there are numerous animations from which to select.

- Grid - A grid in Nicepage is similar to a table in which you can create multiple cells. Each cell can contain images, text, or any other type of content. A significant advantage of the grid is to tie content units together as the page responds to various devices. Otherwise, as a responsive page adjusts for multiple devices (desktop, laptop, tablet, phone), the content can become unstable in its positioning.

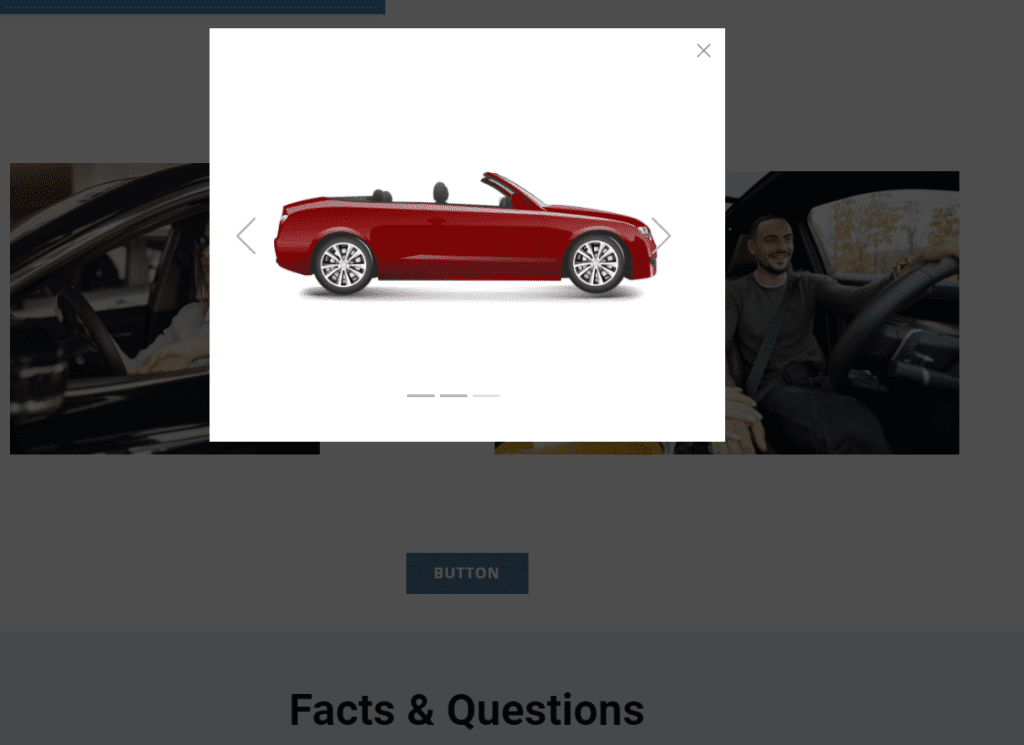
- Modal - A modal is a popup that overlays the page. It can have a transparent background that allows the page to show through. You can create any content in a modal. I like to use image slide shows. Create a single image or button as a hyperlink to launch the modal. The modal can display other images.

Modals can be triggered, as mentioned, with a link, timed to launch after the page has loaded, or set to launch when a view shows intent to leave the page.


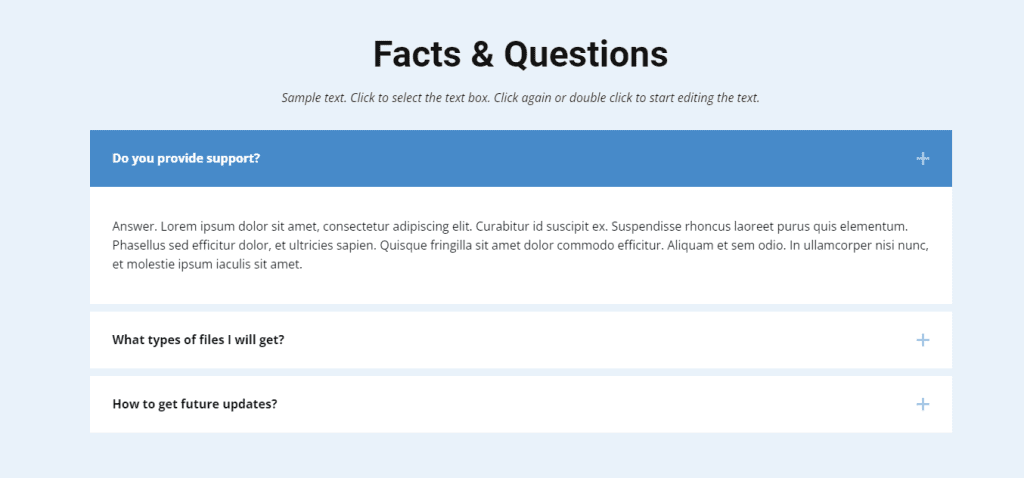
- Accordion - An accordion is a series of labels with content that 'accordions' out when you click the label. (Also on the video)

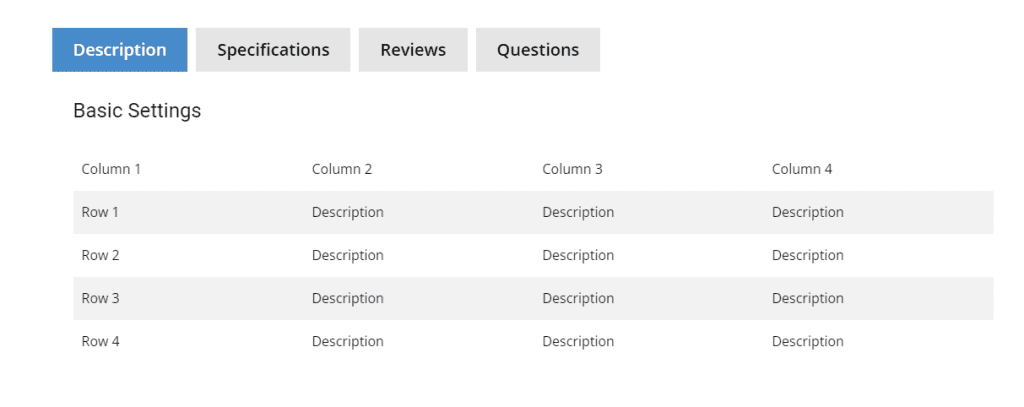
- Tabs - Tabs are similar to accordions. Whereas accordion labels are vertical, tab labels are horizontal, revealing additional content when clicked. (On the video)

Resizing Images


Resizing images is simple on Nicepage. Drag any side or corner of the image and drag it; the image will respond while keeping its aspect ratio. This feature is probably true in any web builder. However, occasionally I will need help sizing an image to fit a particular spot without losing portions of the image I want. I often get around this problem by using HTML.


To use the HTML image tag for an image, I insert an HTML element in the cell or box where I want the picture. I enter a simple image tag in the HTML code, including the image file's location and the width I want. I do not include the height. By doing this, the browser will automatically use the correct height to keep the aspect ratio. The same effect will work by using only the height. I use a percentage rather than a fixed width. In this way, the image will be responsive for different devices. In this way, the image will be in full view.


Jasper Boss Mode

Editing Between Online and Offline


The last feature I will highlight is the ability to work online and offline with Nicepage. When I speak of working offline, it refers to using the desktop app. The ability to work offline is my favorite feature of Nicepage.


You may wonder why I want to edit offline when I can do everything I need online. I can do everything online, but every change I save will be public once I have published a page. If I make a significant change to a page, I may save the changes at several stages, so I keep them should something go wrong. Each time I make a save, my incomplete work becomes public. Not a very positive image to portray!


Instead, I will make sure the desktop app has the current version of the page and will make my changes in the app. Once the changes are complete, I will export them from the app and import them online. So how do I do that?


Notice where the location of the cursor in the nearby image and the popup menu next to it. This menu is related to the selected block with a blue border. The popup menu lists "Export Block." Select this and export that particular block to your computer. Then go to the desktop app and open the same page. Select a block and click on the three dots on the left side of the block. Choose to import block and locate the block you just exported from online.


You will need to do this for each block in the desktop app that is not up-to-date. If the same block was already present on the desktop but is outdated, you must delete the obsolete version.


There may be several applications you can make to this feature. Another application would be when you have a block of information on a website page that you want temporarily removed. Using this feature, you could store it on the desktop and then move it back online when you want to display it again.


Conclusion


This article and series conclude. Please use the comment box below if you have questions or comments. Is there a topic you would like me to address in a future article? Share that in the comments.


Be sure to download a free copy of Nicepage and try these features yourself.


Nicepage wordpress theme builder
https://digitalchowder.com/unlocking-the-power-of-nicepage/

Thursday, October 19, 2023

My Personal Guide to All the Best Features in Nicepage - Part 3

My Personal Guide to All the Best Features in Nicepage - Part 3


My Personal Guide to All the Best Features in Nicepage - Part 3


This is my third article in a four-part series about my favorite web builder, Nicepage. In the first article, "My Personal Guide to All the Best Features in Nicepage, Part 1," we discussed the Nicepage subscription plans. We also mentioned its desktop app for Windows and Mac allows you to design and edit your website offline. Then, in my second article, "My Personal Guide to The Best Features in Nicepage Part 2," I highlighted special design features in Nicepage that I especially like. Some are even unique to Nicepage.


In this third article, we will discuss the options available on Nicepage, allowing you to publish your site to your website from the desktop app.


Publication Options


I have provided screenshots to help you visualize the comments, but there is also a video further down you can view.


Nicepage Best FeaturesNicepage Publishing Options

So let's go to the desktop app for Nicepage. In this case, it is in Windows, but there is also a version for Mac computers. The website showing on the desktop is one I have been working on in the second video for demonstration purposes. We demonstrated some animation, grids, and how they contribute to a responsive website. We also presented a modal, accordion, and tab feature.


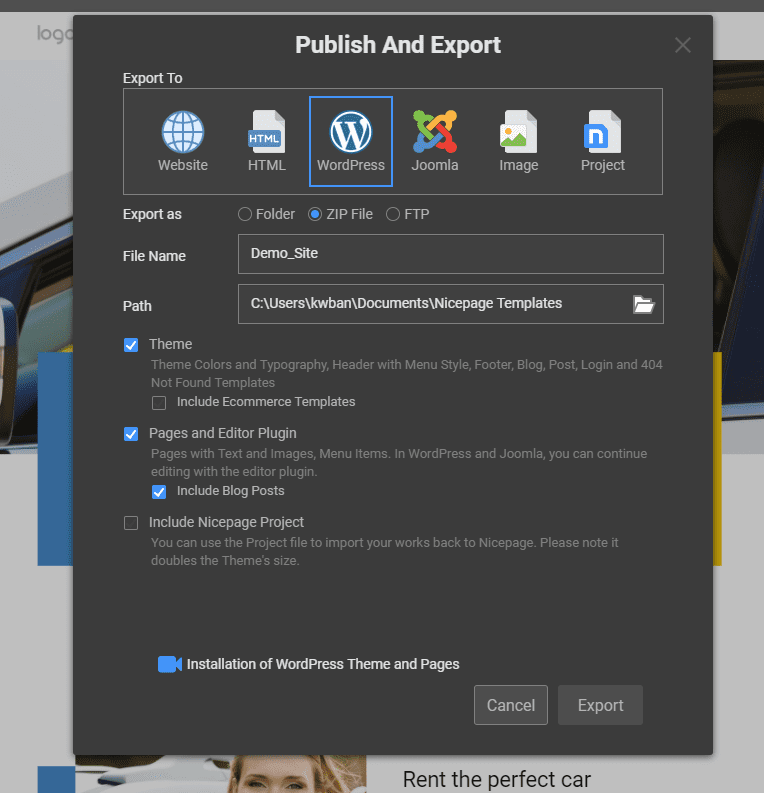
Assuming that we are ready to publish our website on the internet, let's look at our publication options. These methods export the site from our desktop app to our online website. So we go to the publication feature, where you can see the following options:


- Website. This option uploads the site directly to the Nicepage server. This is a simple way to post the site online and allow clients to view it before launching it publicly.

- HTML. For those who prefer a simple, straightforward website rather than a CMS such as WordPress or Joomla.

- WordPress. This is the most popular website option, and Nicepage is a leading theme builder for WordPress.

- Joomla. Though less popular than WordPress, Joomla offers another CMS option.

- Image. Publish a one-page image of the site.

- Website project. This packages the website project for transfer to another computer.

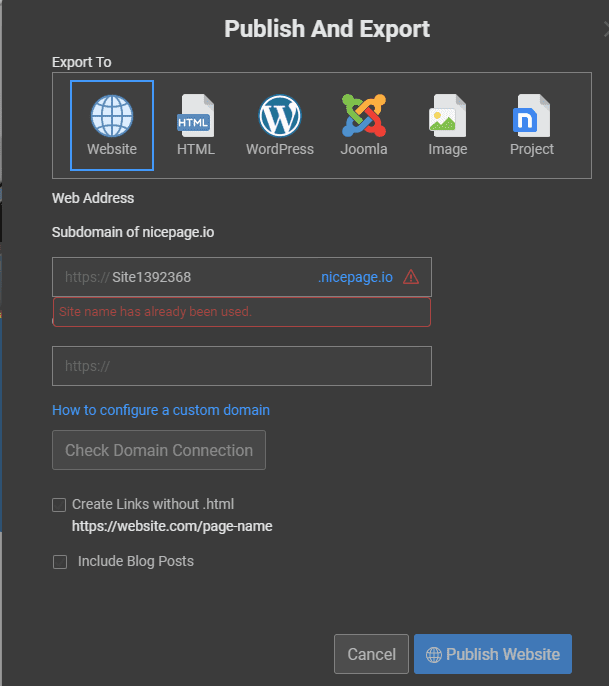
Website Publication


website publicationWebsite Publish option

Starting with the first option, we will publish to a website. The subdomain to which it will be posted is shown in the window. Use this URL to view the site once it's published. A custom domain name that you have registered can also be configured to direct viewers to the Nicepage subdomain. A few other options can also be selected in the window, but we will skip them and go straight to "Publish Website."


Now we can use the subdomain URL to view the site. As you scroll down the home page, you can observe the animation in action with the various page elements as they zoom out or slide in. Click on the button for the modal to have it pop up with the photo slider. And then, you can see how the accordion and tab look and operate. Both are good options for offering viewers an opportunity to view the data or not.


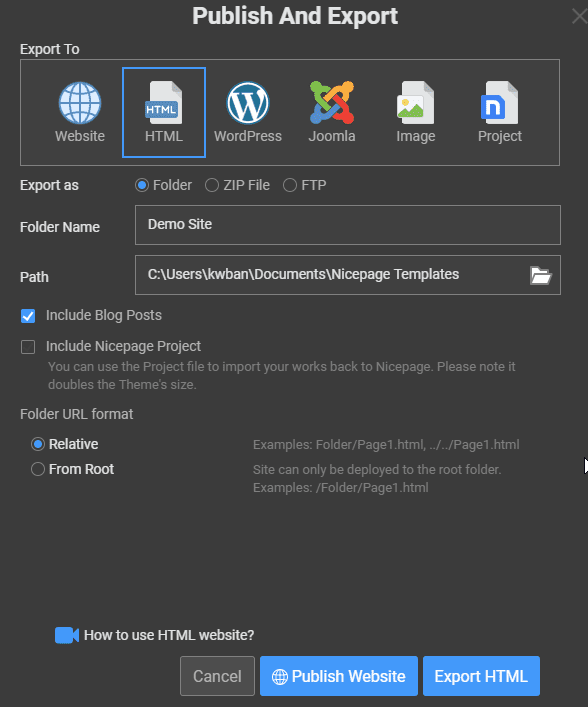
HTML Publication


HTML publicationHTML Publish option

With the option to publish to HTML, we can export the site to a folder, a zip file, or directly to our website using FTP. I use my FTP client, so I take the Folder option and select where to export it.


I will go over to Filezilla, connect to the export folder, and then to my website folder online. I will select all files and folders in the export folder, then drag and drop them into the online folder on my hosting site.


There is no further configuration necessary. I can go to my browser, enter the URL of my website, and immediately view the site. This assumes that my domain is set up with the hosting site and has propagated across the internet.


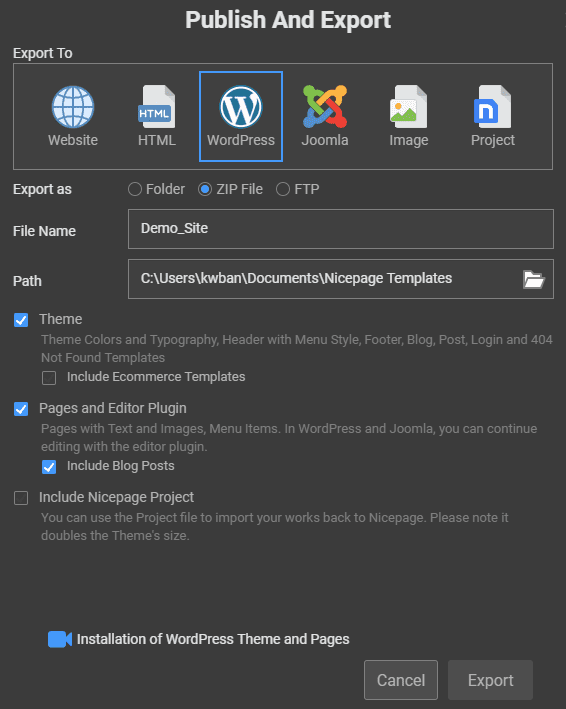
WordPress Publication


wordpress publicationWordPress Publish option

Finally, we will choose the WordPress option for publishing. Again, we can export to a folder, zip file, or FTP. Selecting the zip file option is the most straightforward choice. You will need a more advanced understanding of WordPress to use the folder or FTP approach.


By choosing to export to a zip file, I will install the site on my WordPress website as with any other theme. The only difference will be the import of content and installation of a plugin. The Nicepage plugin will serve as your editor in WordPress to work with your Nicepage web pages.


Before exporting the WordPress zip file, choose which features you want to export to your website. You will want to include the Theme along with pages and Editor Plugin. If you are planning an eCommerce site, retain the templates. If you want to export your site to the desktop app, choose to have the Nicepage Project. Now we are ready to export.


Next, we will go to the wp-admin section of our WordPress website to install the zip file. Once you are in the wp-admin area, select "Appearance" from the left menu and select themes. At the top of the page, click on "add new" and then on "upload theme." You will locate the exported zip file on your computer and click "install."


Now that we have installed our website, we need to activate it. Having done that, click on customize, and you will need to go to self-identity. In this section, you will insert your logo and Favicon from your media library or upload them from your computer. Then go further down to insert the site icon.


Now click the back arrow, then go down to the menus. Under menus, you will need to select the menu you will be using. Most likely, it will already be set.


Next, click the back arrow and go to "Homepage settings." Here you will choose whether the homepage will use the latest post or will be a static page. Although posting is a significant function of my Digital Chowder website, I use a static homepage with links to posts.


At this point, you're ready to click publish and view your WordPress website online.


In my fourth and final Nicepage-oriented article, I will discuss working with your Nicepage-generated website within WordPress. In addition, I will show how to go back and forth between your online and offline versions of the site. You can view all four articles on YouTube for a better visual demonstration of this presentation.


Website Building and Repair


Elite Web PresenceElite Web Presence

Do you find all this a bit overwhelming, or do you not have the time to work with a site? Let me make a suggestion. Go over to Elite Web Presence for some help. Whether you need a complete website build and update, or some cleanup and maintenance, they can do the job for you. They can also help with SEO, along with website backup and security.


Conclusion


Has this series been helpful? Building a website with Nicepage is an easy and efficient way to get your site up and running quickly. Using the tools it offers, you can create an attractive design that drives traffic to your pages and gives customers what they need.


Finally, does all of this sound too daunting or time-consuming? In that case, Elite Web Presence can help build, update or maintain your website to optimize it for success.


Have questions or comments? Please leave them in the comment section below.


Top Posts


As an affiliate marketer, Digital Chowder earns from qualifying purchases.


https://digitalchowder.com/guide-to-all-the-best-features-in-nicepage-part-3/

Wednesday, October 18, 2023

2 Great Project Management Apps for Struggling Solopreneurs

2 Great Project Management Apps for Struggling Solopreneurs


Project Management Apps for The Solopreneur


Project and task management software can help you keep track of all your tasks and projects to stay organized and focused. Here are 2 Great Project Management Apps for Struggling Solopreneurs.


But these are only tools that are no better than how you use them. Alongside these tools is the need for self-management. And only you can make this work, especially for the Solopreneur. No supervisor or team member holds you accountable for the tasks and projects required to succeed. You are the boss!


In this article, I want to highlight the importance of including project management tools in your tool belt and offer practical personal tips to help you use them best. No matter how good the tool is, it is only as good as the user.


Quit Getting Overwhelmed


Have you ever awakened in the night and couldn't get back to sleep because of an idea or undone task that took over your thoughts? As you may have found, a simple solution can be to make a note of that idea or task. Once the note is made, your mind is released from the thought, and you can get back to sleep. A daytime version of this is when we become overwhelmed or stressed from feeling there is more to do than we can accomplish.


The problem is that all the undone tasks and big projects are rolling around in our minds with no way to get a handle on them. There is no plan or organization—just loose thoughts running rampant through our heads. The same simple solution that helped you get back to sleep can also reduce stress and keep the overwhelmed feelings at bay. Organize those thoughts and make notes of a plan. With a written plan, you can get the ideas out of your head and tackle the tasks and projects one chunk at a time without being overwhelmed and stressed. The trick is to have a written plan. Until you do, your mind is not released. It is full of random thoughts.


But making a written plan for your tasks and projects is not the first step. It is the second step. The first step is to create a plan to plan.


The tyranny of the urgent:  Are you familiar with the phrase "the tyranny of the urgent"?  It refers to being tyrannized by urgent tasks that may not be all that important. But they are urgent, so we set aside everything else to do them. While it is true that we do not have control over some of these pressing matters, we can control many. How? By having a plan for our tasks and projects. Often what has become urgent is a task that we kept pushing back until there was hardly enough time to get it done. At that point, it has become critical.


The more we allow tasks and projects to go undone, the more urgency we will have. And the more we will be overwhelmed and stressed. Stop allowing less important tasks and projects to become urgent and take you hostage! When this happens, what is the first task to go undone? Planning!


Set Aside 60 Minutes


So, set aside 60 minutes, get away from interruptions, and make a plan. If you truly devote the 60 minutes to planning and remove all interruptions, I guarantee you will emerge from this time feeling like you had a mini-vacation.


So, how are you going to use these 60 minutes? What plans are you going to make? Here are some suggestions:


- Plan when & how you will plan. For your first 60-minutes session, you may need to spend more time on this than in subsequent sessions. When will you have another of these sessions? How frequently will you have them? Get some dates on the calendar. If you don't, this may be your last session.

- Identify the three most important tasks/projects you face over the next three months. Determine the time frame in which each needs to be accomplished. Then go backward from those dates and schedule when you will lay out a plan for each task/project.

- Start planning for the top priority task/project on your list. As time allows in this session, start planning for the first item on your priority list.

Each of these 60-minute sessions will vary, but I strongly encourage you not to exit a session without a date on your calendar for your next session. I suggest one of these 60-minute planning retreats at least quarterly. You may find it necessary to do so more frequently. Then, revisit your plans weekly. Each week, whether on Friday for the next week or on Monday for the current week, review your project and note what needs to be accomplished during the week ahead. If necessary, make adjustments to the plan and your schedule for that week to do what is most important. Not just what is most urgent.


What Is The Difference Between Projects and Tasks?


I have mentioned both projects and tasks. Is there a difference, or are the terms interchangeable? This is an important question. As you explore the subject online, you will find that the words are often used interchangeably. But this is not truly the case, nor do I use the terms interchangeably. A project is a big event or a significant element of making your business successful. Projects refer to all involved in carrying out that event or essential business element. On the other hand, tasks are the individual items that must be accomplished to complete the project. For instance, a project might be to have a booth for my company at a trade fair. That project involves many actions: register the booth with the fair administrators, decide what the booth will comprise, construct the booth, enlist people to man the booth throughout the fair, etc. Each action is a task, but the project is to have the booth for the fair.


Do I need both a project management app and a task management app? 


This is another excellent question. A good project management app will include task management. Without task management, a project will never get off the ground. But will this cover all my needs in operating my business? My answer to this question is 'No.' Many will disagree with me, but our differences are less about what is accurate or best and more about how we prefer to work. From my perspective, a project management app is about managing projects but not managing all aspects of my business or my daily activities. I may have 2-3 projects at a given time, but I have many tasks to deal with during each day unrelated to any of these projects. I prefer a separate task manager into which I fold jobs both related and unrelated to my projects.


So, having determined that we need to have a regular time to plan and that it could be helpful to have both a project management app and a task management app., let's move on. We will proceed to discuss possible solutions for both of these needs. First, we will address a project management app.


Click Up Project Management App


As an example of project management tools, I will use ClickUp. In the interest of full disclosure, as an affiliate marketer, I may receive credit should you sign up for the app.


So out of all the choices out there, why have I chosen ClickUp? First, I should explain that in recommending this app to you, I have shopped the project management market, chosen this app, registered an account, and used it as my tool. So let me explain why I chose it.


- It is well suited for the solopreneur. Many of the apps I explored assumed larger businesses with multiple teams. I found them difficult to fit my planning process and implementation. Frankly, I found many to be confusing.

- It has a logical, structured approach. This is a feature that makes the app easy to understand and use.

- It has all the tools I need in one place. While I choose to go elsewhere for a task manager, I don't have to. ClickUp has it and sends a daily email listing incomplete tasks.

- It has all the features I need free forever. Since this article is aimed primarily at solopreneurs, it is good to point out that the free forever plan allows an unlimited number of members or team members.

Here is a list of features that come with the free forever plan:


- 100MB Storage

- Unlimited Tasks

- Unlimited Free Plan Members

- Two-Factor Authentication

- Collaborative Docs

- Whiteboards

- Real-Time Chat

- Email in ClickUp

- Kanban Boards

- Sprint Management

- Native Time Tracking

- In-App Video Recording

ClickUp Overview


Now let's give an idea of how project management might work and, in the process, provide an overview of ClickUp. Of course, managing a project using a different app will have some differences, but the basics will be the same.


ClickUp hierarchies:  ClickUp is built as a series of hierarchies. The first tier 0f this hierarchy is the workspace. A workspace represents your business or company and so will contain everything related to the company. Within your company or workspace are spaces. These are your projects. You can have an unlimited number of spaces (projects) in your workspace (company). Within a space (project), lists are created. Each list contains any number of tasks related to certain aspects of the project. So, for each project, you end up with several lists necessary to accomplish that project, with several related tasks in each list.


Building a project: When preparing for a project, I start by creating a space within my company workspace. Let's say I plan to have a booth at a trade fair.


- The first stage will be to plan the project working within the space I created for the project. Within the project space, several tools help with planning and monitoring the project's progress. Here are some of the tools:


- Board on which I can view all lists and tasks on one screen.Calendar to reference the overall time frame and when tasks need to be completed.

- Gantt chart to display a timeline of starting & stopping dates for assignments.

- Box, which gives an overview of all pieces of the project.

- Mind Map to visualize your Workspace Hierarchy or create your own free-form Mind Map for planning and organizing projects and ideas. As ideas are added, they are each mapped to other elements of the project, allowing a visual of how the project ties together.

- Workload allows you to see your team's capacity if you are working with a team. You can see who is over or under-assigned and reassign tasks accordingly.

- Whiteboard: Collaborate, brainstorm ideas, solve problems and get work done quickly.

For this first stage, I will start with the whiteboard to brainstorm ideas for the project. With several ideas, I will outline a plan. Then I will move on to the second stage of the process.


- Second Stage: In the first stage, I brainstormed to form the nature of my project and outlined how it would operate and what it would accomplish. In stage two, I want to bring the project to life. This is where I break down each piece of the project into actions. First, I break it down into sections. For my fair booth, the sections could be:


- Determine the message & graphics

- Identify vendors & contractors to provide materials and labor

- Design & construct the booth

- Move the booth onsite & set it up,

- Make accommodations for the booth operators

- Etc.

Around each of these sections, I will create a list and the tasks necessary to accomplish that section within each list. I will also assign these tasks to a timeline for when each should be started and completed.


- Third Stage: The third stage is the implementation of the project. As a solopreneur, this is all on me. If I have been realistic in the second stage, I have not assumed more responsibility for myself than is reasonable. Without a team, I will have to contract out what I can, leaving my role primarily to that of project manager. That in itself will be plenty. So as project manager, I will set aside time daily to monitor the project pieces using the tools made available by ClickUp. What tasks have been checked off? What tasks are currently underway, and what is their progress? Will upcoming tasks be able to start on time? If not, what is needed to get them going? These are some of the questions I need to raise daily to keep the project on track.

This project is just one example of using a project management app and of the ClickUp project manager. There are many other project management apps out there. If ClickUp is not for you, find one that fits how you work and the nature of your company.


ClickUp User Plans:

- Free Forever:  This plan is said to be for personal use, but solopreneurs should be well-served using this plan. While there are a few differences between this and the paid plans, the allowed storage space is a big difference.

- Unlimited: ($5 per member / mon) This is said to be best for small teams.

- Business ($12 per member /mon) Best for mid-sized teams

- Business Plus ($19 per member /mon) Best for multiple teams

The word to notice in these plans is the word 'teams.' If you are a solopreneur, there are no teams, again emphasizing the sufficiency of the Free Forever plan.


Next, we will consider a task management app.


Todoist Task Management App


Todoist ad2

Todoist promotes itself as "The world’s #1 task manager and to-do list app." And PC Mag contributes to that image with the pronouncement, "Todoist is the number one to-do list app.” The app's excellence in managing tasks led me to choose it for personal and business use. While emphasizing its excellence at managing tasks, its business plan is geared for teams and has project management features. If you find a project management app such as ClickUp to be overkill for what you need to do, Todoist Business might be what you need. It will provide shared lists for teams allowing collaboration on projects which may be the primary feature you are looking for. At $6 per user per month, it is affordable for a small business.


Todoist User Plans:

- Free: For starters

- Pro: ($4 /mon) For power users

- Business: ($6 per user /mon) For teams

So why would I choose ClickUp for project management instead of Todoist? The same features Todoist lacks in project management are the main features I want. That is project envisioning and planning. If tracking all the tasks related to a project is all I'm looking for, Todoist does an excellent job and would be my choice. But I want more. And I can get it for free from ClickUp.


At this point, I may have you confused about why I even use Todoist. I have used Todoist for years and have been pleased with its functionality. But more recently, I began to feel the need to better plan and stay on top of my projects. I started looking for a project management app and selected ClickUp. But unless I also use Todoist, I find a gap in keeping up with my tasks.  Though ClickUp does a great job of keeping me on top of my project-related tasks, I have many other non-project-related tasks. I still need to stay on top of these. So I find it works well for me to blend the two. As I review my project tasks for the week in ClickUp, I include those I need to do each day in Todoist alongside other non-project tasks. Then I have them all together and can prioritize the whole list each day.


How do you choose?


As you weigh the pros and cons of these two apps, ask yourself the questions: do I need both or just one, and if one, which one? As you consider these questions, here are a couple more questions to help. Am I in more need of managing projects or tasks? If you find that you need project management more, you might consider whether using a task manager would also be beneficial.


Regularly review Your Projects and Tasks


If you haven't already guessed, I am inclined toward being organized. I don't like being tyrannized by a constant urgency of tasks. That doesn't mean I enjoy planning. I don't. But I enjoy it more than I enjoy being stressed. 


If you are a solopreneur,  as I am, you don't have a team around you to cover the areas in which you are not strong. So if planning is not your forte, you will likely have to step up and do something you don't enjoy or feel capable of doing. For this reason, I have offered some of my practices in planning in hopes of being helpful. But even if you find my methods unhelpful, I believe you will find help with a Project Management App to give you direction and structure for your planning.


To that end, I invite you to check out one or both of these apps.  Here are links you can use for that purpose:


ClickUp Link                            Todoist Link


Please leave comments or questions below.


Jasper Boss Mode
https://digitalchowder.com/2-great-project-management-apps-for-struggling-solopreneurs/

My Personal Guide to The Best Features in Nicepage Part 2

My Personal Guide to The Best Features in Nicepage Part 2


My Personal Guide to The Best Features in Nicepage Part 2


Welcome to the Digital Chowder blog! It is part two of my guide to all of Nice Page's most impressive features. 


I talked about the Nicepage subscription plans and desktop app in the first video. The app is available for both Windows and Mac. The app allows you to do your design work offline on your computer and do as much as you want online. Just an excellent feature that I have not seen with any other web builder in part two.


In this video, we'll talk about some of the design features of Nice Page that I like. This article will not be a how-to but will highlight features I like about Nicepage.


Nicepage App Dashboard:


Nicepage App Dashboard

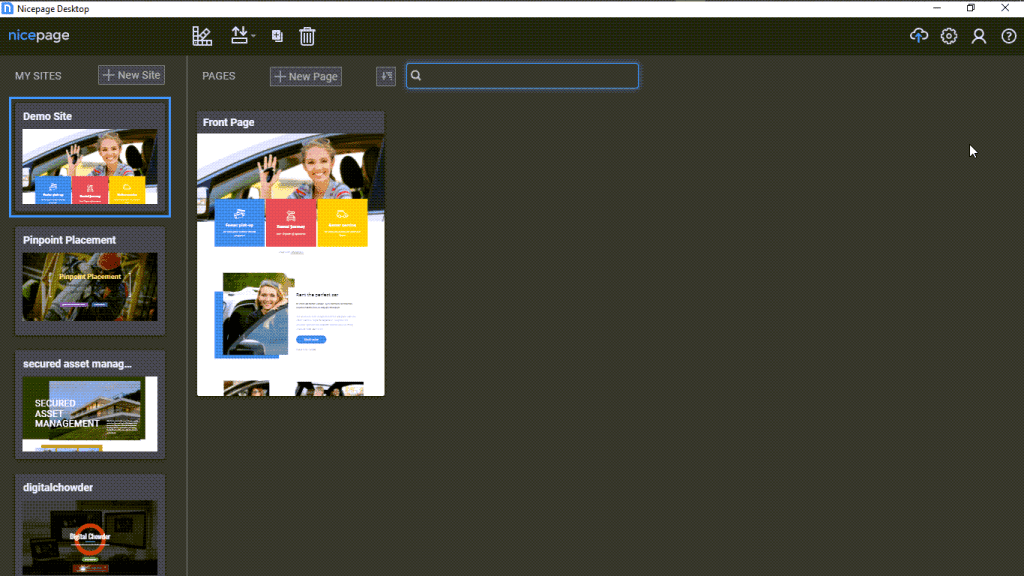
So here we are at the dashboard for the Nice Page app. I use the Windows version. You can see on the left side a list of the websites I am working with on Nicepage. I will select this site I set up as a demo site. So click on it, and we go to the front page of the website design.


Simple Format:


From here, we will talk about the simple Nicepage design format. With some builders, I need clarification on the format and help to know what to do. Also, with some builders, I feel locked into a structure that only sometimes works best for what I want to do. But Nicepage is different.


simple format

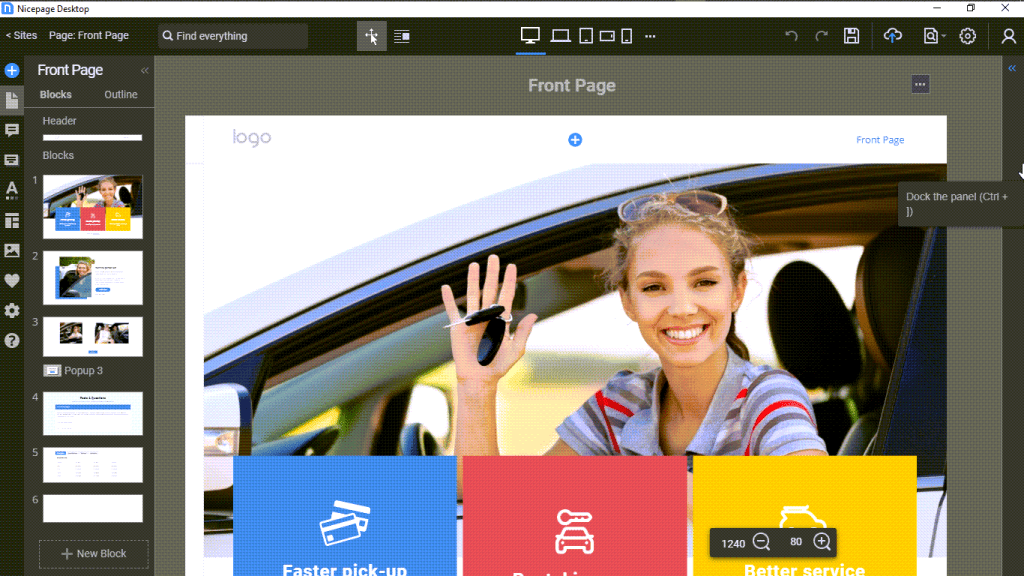
Websites these days are being built using blocks of content. And that is the case with Nicepage. You can see two blocks in this design in the image above, in addition to the header and footer.


Adding and Designing A Block:

Adding a block is a simple matter of clicking on the add block link and then choosing a design template from the library or adding elements of my choice for a preferred design.


We can see in this first block that an image is in the block as an independent element. Behind it is another separate element called a shape. To the right is a list element comprised of three items called cells.


designing a block

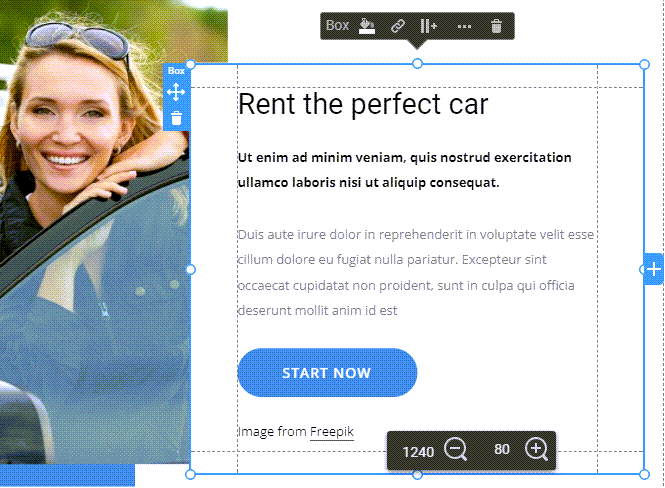
On the right is a box element. And within the box are a heading, text, and a button. And all of these are in the box. The box ties these elements together. The components within the box move with it, going where it goes. This functionality is essential for a responsive website. We are working within a desktop view, but we also want these elements to remain aligned in a phone view.


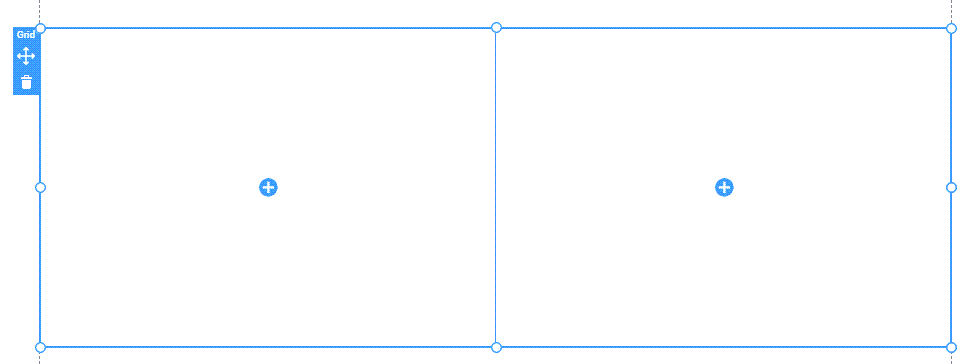
Another feature that helps to tie elements together for a responsive website is the grid. We can use 2, 3, or more cells in a grid. These cells can be independent of each other or can duplicate one another. 


use of a grid

And here is what the grid looks like with images in desktop view.


And here is what the grid looks like with images in mobile view.


Modal:


Next, we will look at the modal. I am still looking for the modal in other builders, but it is a feature I like to use. It is one of several ways to offer more information but allows the viewer to choose whether to view it. This feature helps keep a more straightforward and cleaner page rather than cramming in information viewers may want to avoid seeing. By so doing, we can prevent losing visitors who become impatient wading through content they don't want to get to the content they do want.


use of a modal

Here is what a modal might look like, but view the video below to demonstrate how it functions.


Three choices are available for launching a modal:


- Button: Launch the modal by clicking a button.

- Timer: Schedule the modal to pop up a certain number of seconds after the page opens.

- Exit: Set the modal to pop up when the visitor intends to exit the page.

Modal Plus Slider:


A modal will allow the use of any element. I like to use the slider in modals. I suggest using an image linked to a modal so the viewer can click the image and have a slide show pop-up of other related images.


Animation:


Another neat feature of Nicepage is animation. You will need to view the video to see this in action. Two blocks in the sample web page utilize animation, activated by scrolling. As the block emerges on the screen, the animation is triggered. Scrolling triggers the main image in the block shown below to zoom in. Each cell in the grid also uses zoom animation.


Accordion:


The next feature to highlight is the accordion. If you are unsure what the accordion feature is, you may have seen one without realizing it was an accordion. The modal is often used for FAQs, though that is only one use for them. Shown below is a FAQ accordion.


use of an accordian

Reordering Blocks:


Web page blocks serve as units of related content. As such, blocks can serve as visual highlights of their content by using different backgrounds and other graphic design features. An excellent quality of Nicpage is the ease with which you can reorder blocks. Without moving individual elements on the page, you merely need to click an up or down arrow on the block to reorder it above or below the surrounding blocks. Moving a block can amount to significant page editing with the click of an arrow.


Additionally, there may be a block with content that is temporarily unwanted. Will you delete that block you have spent time designing? After all, you will eventually want to include it on the page again. No problem. Hide the block so it does not appear publicly.


Tab:


A similar feature to the accordion is the tab. The tab, like the accordion, allows information to remain hidden until a visitor chooses to view it. So as the example below shows, the tabs identify the data contained under that tab. It is much like a file folder. Clicking the tab reveals its contents.


the tab

Menu:


The last feature to highlight is the menu. The unique and convenient factor of the menu feature in Nicepage is that it is unnecessary to leave the page you are working on to edit the menu. No need to go to the WordPress widget and menu section to make menu changes.


Items on the menu can be added, removed, or reordered within the page design. Same with design elements such as hover, active, background, font, etc.


Conclusion:


I hope this article has been helpful. If you haven't already seen the video or article for part one of this series, I encourage you to read, "My Personal Guide to All the Best Features in Nicepage, Part 1."


Also, I hope you will use this link for a free download of Nicepage and check it out yourself.


If you have found this article to be helpful, please leave a comment below.


Facebook

Twitter

Instagram

LinkedIn

Top Posts


As an affiliate marketer, Digital Chowder earns from qualifying purchases


https://digitalchowder.com/my-guide-to-the-best-features-in-nicepage/

10 Smart E-Commerce strategies to Increase Your E-Commerce Sales

Increase Your E-Commerce Sales If you need help to increase your e-commerce sales despite putting in much effort, you're not alone. With...