Monday, October 16, 2023

My Personal Guide to All the Best Features in Nicepage, Part 1

My Personal Guide to All the Best Features in Nicepage, Part 1


My Personal Guide to All the Best Features in Nicepage, Part 1


Introduction


Hello, and welcome to the Digital Chowder blog. I'm Wayne, and this is the first of four posts and videos I will be doing about All the Best Features of Nicepage, my favorite website builder. This post will not be a how-to about how to use Nicepage. Nor will it be a review comparing Nicepage alongside other web builders. Instead, I will highlight some of my favorite features found in Nicepage.


This first post/video will address the Nicepage subscription plan, why I like it, and why it is a good fit for me. Then I will touch on the desktop app with Nicepage, giving an overview. Finally, I will discuss the options for publishing your website after designing it in the desktop app.


Nicepage Subscription Plans:


Nicepage subscription plans

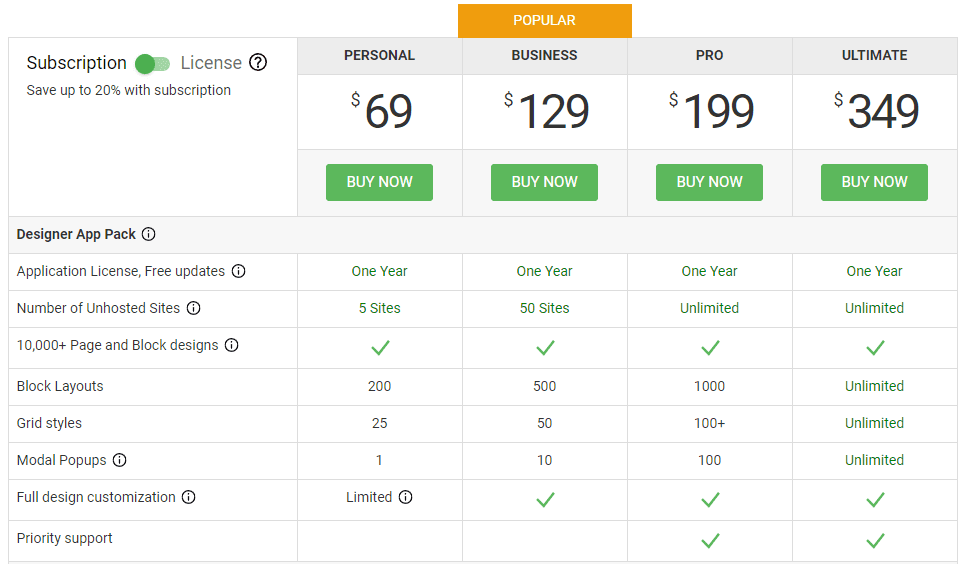
If you go to the Nice Page website and then to their premium page, you will see four subscription plans outlined. Each plan has two options: a subscription and a license. So what is the difference? With the license, you're paying a one-time fee to purchase the software; with that, you're getting one year of updates for the software. But beyond the first year, there will be an additional fee if you want any updates. I have chosen the subscription approach. With the subscription, you pay an annual fee and receive the software and all updates during the year. And it is ongoing.


When I started with Nice Page, I used the Personal plan since I only needed one website for my business plus a personal site. With the Personal plan, I could have as many as five websites. So that was quite adequate. But now I design websites for other businesses besides my own. So I need to use Nicepage for more than five websites. However, I don't need an unlimited number of sites.


Elementor subscription plans

So, let's jump over to the Elementor website and look at their plans to understand why the Nicepage subscription is a good fit for me. With Elementor, three plans start with the Essential plan, which is $59 a year. This plan allows you one website. If you jump to the Expert Plan, which is $199 a year, you are allowed 25 websites.


Now let's go back to the Nicepage website. Back there, the Business plan offers a middle ground between the Personal and Pro plans, which Elementor does not have. The Business plan for $129 a year allows me 50 websites and additional features. This is just right for me. I need more than the Personal plan offers, but I don't need all that the Pro plan provides. So the Business plan is the one I use. I would pay $199 annually at Elementor and only get 25 sites.


Desktop App:


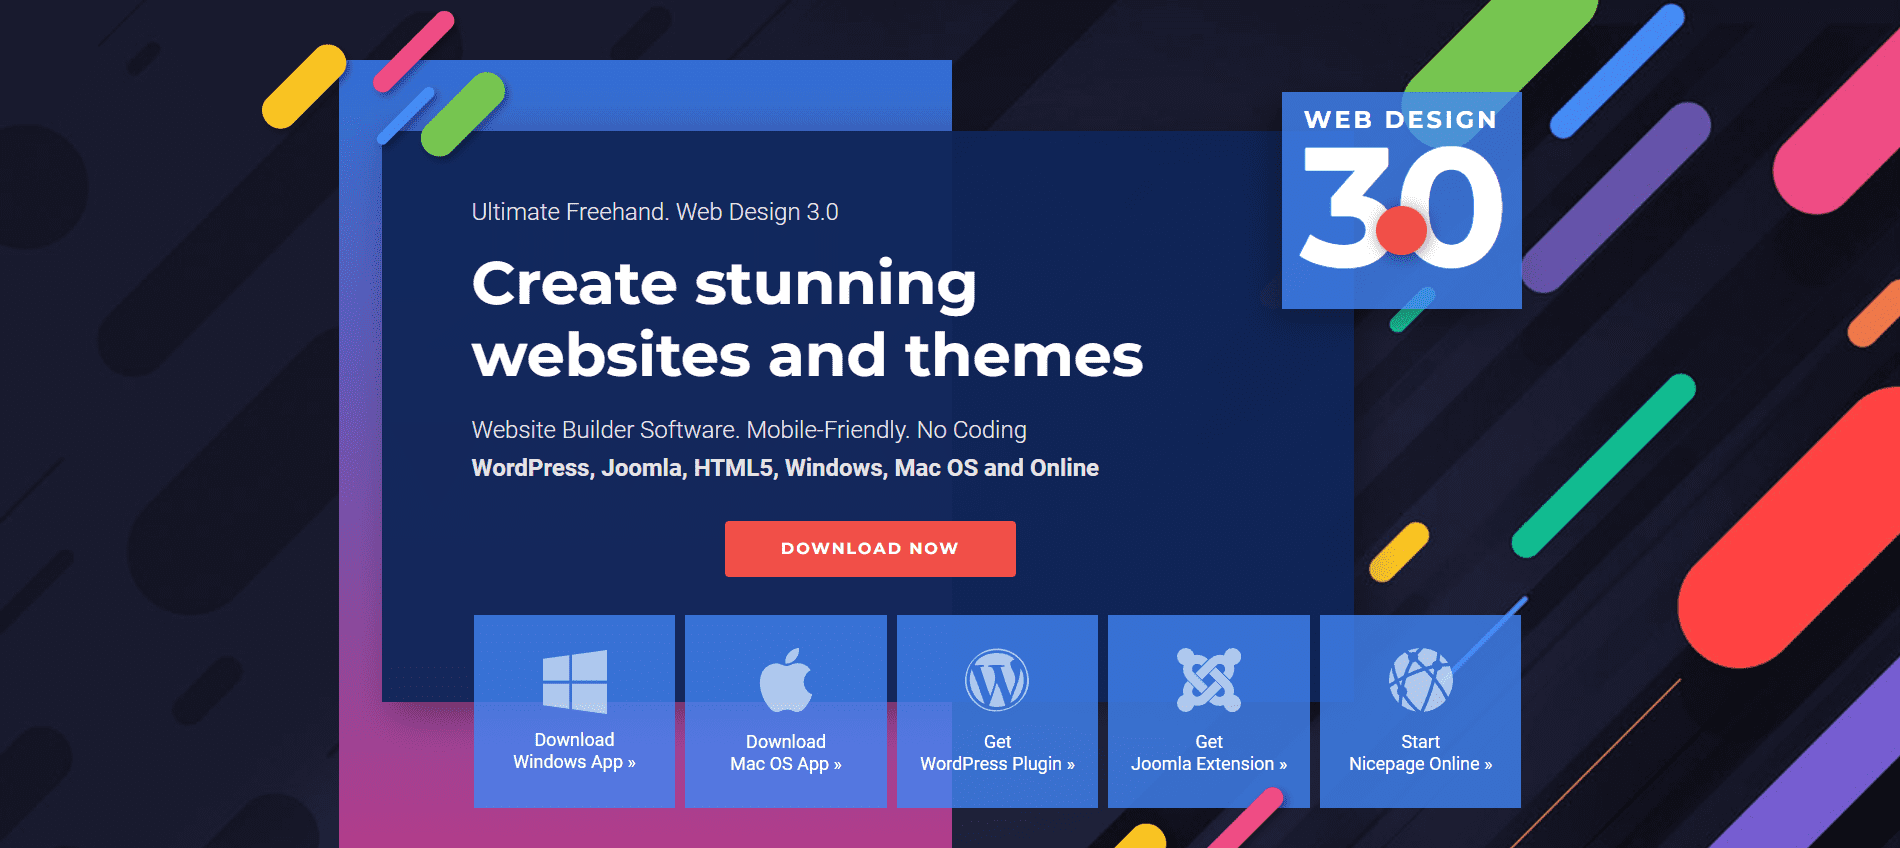
The next feature I want to highlight is the desktop app with Nicepage. There is a desktop app for both Windows and Mac computers. If you're building a WordPress website, you also get a WordPress plugin; if you're doing a Joomla site, you get that one.


You can do the whole website on your computer before you import it to your WordPress website. But it is not required. Creating the site layout is the only portion of building a website that requires the desktop app. Once you have created a layout for your website, you can export the site to a zip file and install it as a WordPress theme. You can do the remainder of the design online. Or not! You can also build the complete site on your desktop before installing it online.


Once you have installed the design theme on your WordPress site, you can work back and forth between online and offline.


Once your site is online, you can edit it on the desktop or do it online, whichever you choose. I do both. I like to be able to do major edits on my desktop, knowing that when I do a save, it's not going to go public.


Next, let's look more closely at the desktop app.


You can check the video above to see what I'm talking about in the following comments.


Nicepage desktop app

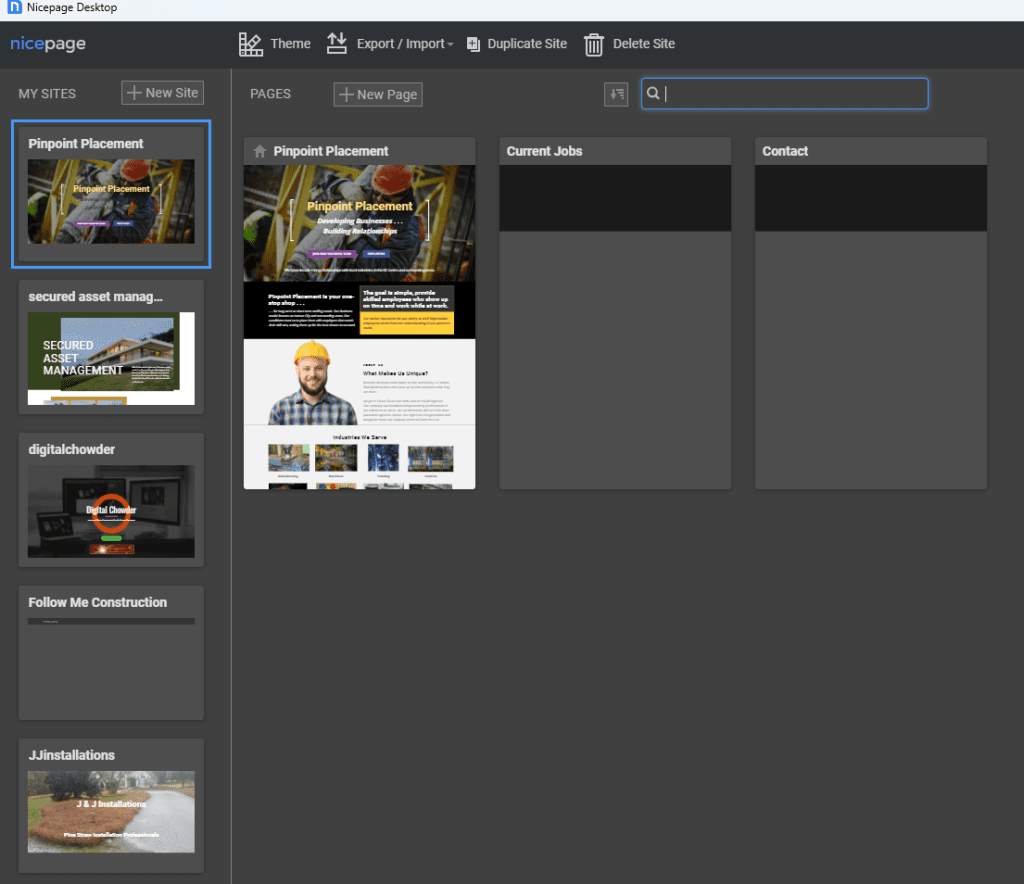
As you view the desktop application listed in the left-hand column, you will see a list of your websites. Click the appropriate icon to open the site you want to work with. You can also delete a website you are no longer working with from this page. To create a new website, use the "New Site" button.


If you are creating a new website, you can start with a blank website and build the site from scratch, adding elements as you go. Or, you can use your graphics to form the bases of the site. Yet another option is to select a design template from the various categories listed. Once you choose a template, you can stay close to the template design or use it only as a starting point.


Publishing The Website:


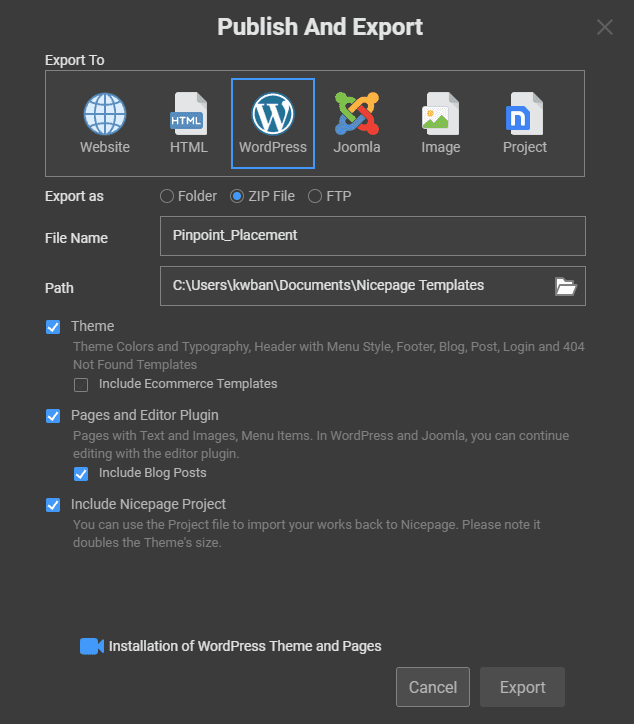
When you are ready to export my website to an online host, I can click the "Publish" button. You can publish a temporary Nicepage-hosted site, an HTML format, or a WordPress theme.


publishing the website

The temporary "Website" option is quick and easy. Press the publish button to install the site on the Nicepage server. Then share the subdomain with a client for their review of the site. There is no configuration or installation or uploads to do to have a site looking like the one on your desktop.


Another option is an HTML site. This choice requires an FTP app to upload to the host server.


If you publish a WordPress site, use the output zip file to install in WordPress as you do with any other theme.


Conclusion


In this post, I have given an overview of Nicepage. In the next post, I will detail some of my favorite design features in Nicepage. Meanwhile, I encourage you to get a free Nicepage download and try it. Then come back to the other posts for further help.


Facebook

Twitter

Instagram

LinkedIn

Top Posts


https://digitalchowder.com/all-the-best-features-of-nicepage/
Sunday, October 15, 2023

My Personal Guide to All the Best Features in Nicepage, Part 1

My Personal Guide to All the Best Features in Nicepage, Part 1


My Personal Guide to All the Best Features in Nicepage, Part 1


Introduction


Hello, and welcome to the Digital Chowder blog. I'm Wayne, and this is the first of four posts and videos I will be doing about All the Best Features of Nicepage, my favorite website builder. This post will not be a how-to about how to use Nicepage. Nor will it be a review comparing Nicepage alongside other web builders. Instead, I will highlight some of my favorite features found in Nicepage.


This first post/video will address the Nicepage subscription plan, why I like it, and why it is a good fit for me. Then I will touch on the desktop app with Nicepage, giving an overview. Finally, I will discuss the options for publishing your website after designing it in the desktop app.


Nicepage Subscription Plans:


Nicepage subscription plans

If you go to the Nice Page website and then to their premium page, you will see four subscription plans outlined. Each plan has two options: a subscription and a license. So what is the difference? With the license, you're paying a one-time fee to purchase the software; with that, you're getting one year of updates for the software. But beyond the first year, there will be an additional fee if you want any updates. I have chosen the subscription approach. With the subscription, you pay an annual fee and receive the software and all updates during the year. And it is ongoing.


When I started with Nice Page, I used the Personal plan since I only needed one website for my business plus a personal site. With the Personal plan, I could have as many as five websites. So that was quite adequate. But now I design websites for other businesses besides my own. So I need to use Nicepage for more than five websites. However, I don't need an unlimited number of sites.


Elementor subscription plans

So, let's jump over to the Elementor website and look at their plans to understand why the Nicepage subscription is a good fit for me. With Elementor, three plans start with the Essential plan, which is $59 a year. This plan allows you one website. If you jump to the Expert Plan, which is $199 a year, you are allowed 25 websites.


Now let's go back to the Nicepage website. Back there, the Business plan offers a middle ground between the Personal and Pro plans, which Elementor does not have. The Business plan for $129 a year allows me 50 websites and additional features. This is just right for me. I need more than the Personal plan offers, but I don't need all that the Pro plan provides. So the Business plan is the one I use. I would pay $199 annually at Elementor and only get 25 sites.


Desktop App:


The next feature I want to highlight is the desktop app with Nicepage. There is a desktop app for both Windows and Mac computers. If you're building a WordPress website, you also get a WordPress plugin; if you're doing a Joomla site, you get that one.


You can do the whole website on your computer before you import it to your WordPress website. But it is not required. Creating the site layout is the only portion of building a website that requires the desktop app. Once you have created a layout for your website, you can export the site to a zip file and install it as a WordPress theme. You can do the remainder of the design online. Or not! You can also build the complete site on your desktop before installing it online.


Once you have installed the design theme on your WordPress site, you can work back and forth between online and offline.


Once your site is online, you can edit it on the desktop or do it online, whichever you choose. I do both. I like to be able to do major edits on my desktop, knowing that when I do a save, it's not going to go public.


Next, let's look more closely at the desktop app.


You can check the video above to see what I'm talking about in the following comments.


Nicepage desktop app

As you view the desktop application listed in the left-hand column, you will see a list of your websites. Click the appropriate icon to open the site you want to work with. You can also delete a website you are no longer working with from this page. To create a new website, use the "New Site" button.


If you are creating a new website, you can start with a blank website and build the site from scratch, adding elements as you go. Or, you can use your graphics to form the bases of the site. Yet another option is to select a design template from the various categories listed. Once you choose a template, you can stay close to the template design or use it only as a starting point.


Publishing The Website:


When you are ready to export my website to an online host, I can click the "Publish" button. You can publish a temporary Nicepage-hosted site, an HTML format, or a WordPress theme.


publishing the website

The temporary "Website" option is quick and easy. Press the publish button to install the site on the Nicepage server. Then share the subdomain with a client for their review of the site. There is no configuration or installation or uploads to do to have a site looking like the one on your desktop.


Another option is an HTML site. This choice requires an FTP app to upload to the host server.


If you publish a WordPress site, use the output zip file to install in WordPress as you do with any other theme.


Conclusion


In this post, I have given an overview of Nicepage. In the next post, I will detail some of my favorite design features in Nicepage. Meanwhile, I encourage you to get a free Nicepage download and try it. Then come back to the other posts for further help.


Facebook

Twitter

Instagram

LinkedIn

Top Posts


https://digitalchowder.com/all-the-best-features-of-nicepage/

Friday, October 13, 2023

Discover the Benefits of Using Ubersuggest

Discover the Benefits of Using Ubersuggest

Need help with SEO? With Ubersuggest, you can gain valuable insights into your website and decide how best to optimize it for success. Gain access now!

digitalchowder.com
https://www.youtube.com/watch?v=H0VpSkODgoA&list=PLWQ4cYNe7hB5Y6ng82BiA5vPO0luR625_&index=5

Tuesday, October 10, 2023

 Harnessing the Benefits of Elite Web Presence Hosting

Harnessing the Benefits of Elite Web Presence Hosting

NOTE: Let me introduce you to my "other" venture, Elite Web Presence, which caters to home and small businesses. Until recently, my focus revolved around crafting WordPress themes and website designs for small businesses and organizations. However, I can now offer comprehensive services for WordPress websites by joining forces with an outstanding website hosting service and a provider of WordPress utilities, otherwise known as plugins. The most remarkable aspect? These exceptional services are incredibly affordable for small businesses.

Read on . . .

In our increasingly digital world, a robust online presence is no longer a luxury – it's a necessity. As businesses, big and small, navigate the competitive landscape, a strong web presence has emerged as a critical differentiator.

hosting solution ad

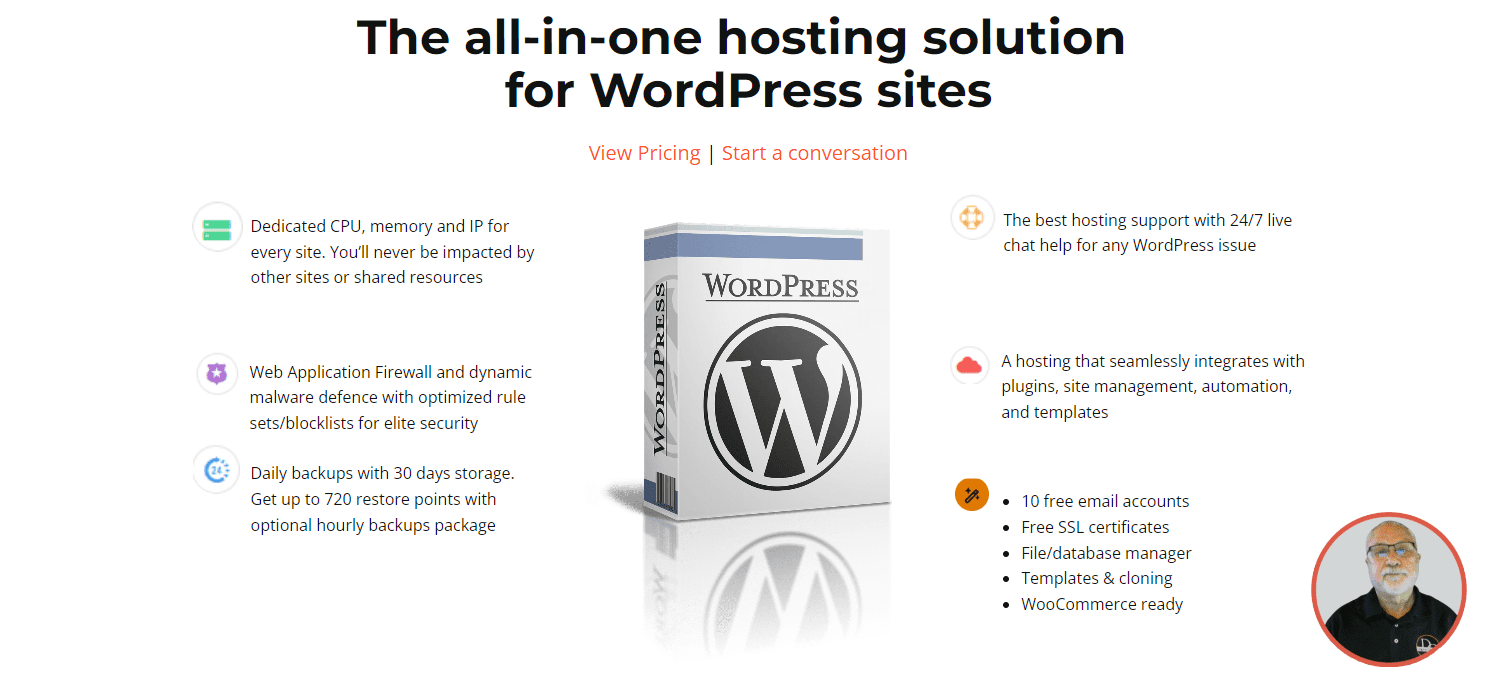
Welcome to the Elite Web Presence (EWP) Hosting concept, your ticket to a superior online identity. EWP Hosting is not your run-of-the-mill web hosting solution. Its comprehensive package encompasses high-speed performance, exceptional security, a first-class collection of WordPress plugins, along with website creation and maintenance.

Understanding EWP Hosting

EWP Hosting is an all-inclusive web hosting solution for the WordPress website beyond just providing a space for your website on the internet. It begins with the promise of superior server performance, ensuring that your website loads quickly and runs smoothly, no matter the number of visitors. The hosting is built on a robust infrastructure that guarantees nearly 100% uptime, which ensures your website is always accessible to your customers.

Additionally, you can choose the location of the servers hosting your website from a long list of sites in the United States and worldwide. This will place your website nearest your bulk of customers for faster page delivery.

But it doesn't stop at performance. Understanding the growing cyber threats, EWP Hosting incorporates advanced security measures. These include regular malware scanning, an SSL certificate for encrypted data transfer, DDoS protection, and a firewall to guard against unauthorized access.

EWP Hosting offers an extensive range of features and benefits designed to elevate your website and business to new heights:

Superior Performance: Our hosting solution ensures top-tier server performance, delivering fast loading speeds that enhance user experience and improve your website's SEO ranking.
Unparalleled Uptime: We guarantee nearly 100% uptime, meaning your website will always be accessible to your customers, ensuring you don’t lose potential leads or sales due to server downtime.
Robust Security: We prioritize your website's security. With regular malware scanning, SSL certificates for secure data transfer, DDoS protection, and a firewall, you can rest assured knowing your site is shielded from potential cyber threats.
Scalability: As your business grows, so can your web presence. Our hosting service offers scalability to cater to your expanding needs, allowing for easy upgrades as your traffic increases.
Learn more about EWP hosting.

Customizable Options to Meet Specific Website Needs

Next, let's talk about other services that come alongside your hosting plan and complement your website performance by adding SEO, backup, and other functions to beef up the features of your website and allow it to operate professionally.

Here is a list of WordPress plugins that accompany your EWP hosting:

Image   Smush Pro - The best image optimizer plugin for WordPress.

Image   Hummingbird Pro - Everything you need to get your site running super fast.

Image   Defender Pro - Regular security scans, vulnerability reports, safety recommendations, and security tweaks for WordPress.

Image   Hustle Pro - Grow your business and audience with this super easy, super slick email opt-in and marketing plugin.

Image   Forminator ProDrag and drop WordPress form builder plugin with interactive polls and quizzes for increasing user engagement and building a following.

Image   SmartCrawl Pro - Boost your PageRank and drive more traffic to your site with little effort and simple configuration.

Image Snapshot Pro - Make and schedule incremental backups of your WordPress websites and store them on secure cloud storage.

Image   Shipper Pro - Shipper Pro moves WordPress websites with one click, from host to host, local to production, development to live, top to bottom without FTP.

Image   Beehive Pro - Customizable Google Analytics dashboards, statistics, and reports for WordPress and Multisite.


Dashboard - All these plugins are available as a package with no extra cost to your hosting plan. Use as many as you wish. In addition, log into your account to monitor all these features from a dashboard. See at a glance if there are any issues. Administer and schedule updates, security, backups, and more from the dashboard.

These plugins are available with or without hosting: As mentioned, these plugins come as a package with a hosting plan. But you may subscribe to this whole collection of plugins without a hosting plan. You can have all nine of these plugins for a fraction of the cost of other professional-grade WordPress plugins. See for yourself.

WordPress Themes and Website Design

EWP continues to specialize in designing custom WordPress themes and building WordPress websites. However, with the addition of hosting services, we have made an adjustment to our pricing structure. For our hosting clients, we now offer theme and website design services at a greatly reduced price. For more information, please visit our website at https://elitewebpresence.com.

Whether you are a hosting client or not, we specialize in building WordPress websites tailored to your needs and provide comprehensive site management services. We will ensure that your website is expertly managed to the extent that suits your requirements.

See more about tailor-made WordPress websites.

Conclusion:

Step up and check out the advantages of Elite Web Presence Hosting and WordPress website design. Go to the website today and step into a unique WordPress website experience.

elitewebpresence.com


https://digitalchowder.com/harnessing-the-benefits-of-elite-web-presence-hosting/

Friday, October 6, 2023

Sunday, September 24, 2023

How Clockify Can Help with Your Work and Billable Hours

How Clockify Can Help with Your Work and Billable Hours

How Clockify Can Help Your Business

The importance of tracking work and billable hours

Efficiently tracking work and billable hours is crucial to running a successful business or project. It ensures transparency with clients and fosters accountability among team members. Moreover, it provides a clear overview of how time is utilized, revealing areas for improvement and productivity trends. This enhances productivity and eliminates potential billing discrepancies, improving client satisfaction.

Enter Clockify, the ultimate solution for comprehensive time tracking. With its array of features, Clockify simplifies the process of monitoring work and billable hours, ultimately boosting productivity and profitability.

Features and benefits of Clockify

Clockify is packed with features designed to make time tracking effortless and insightful.

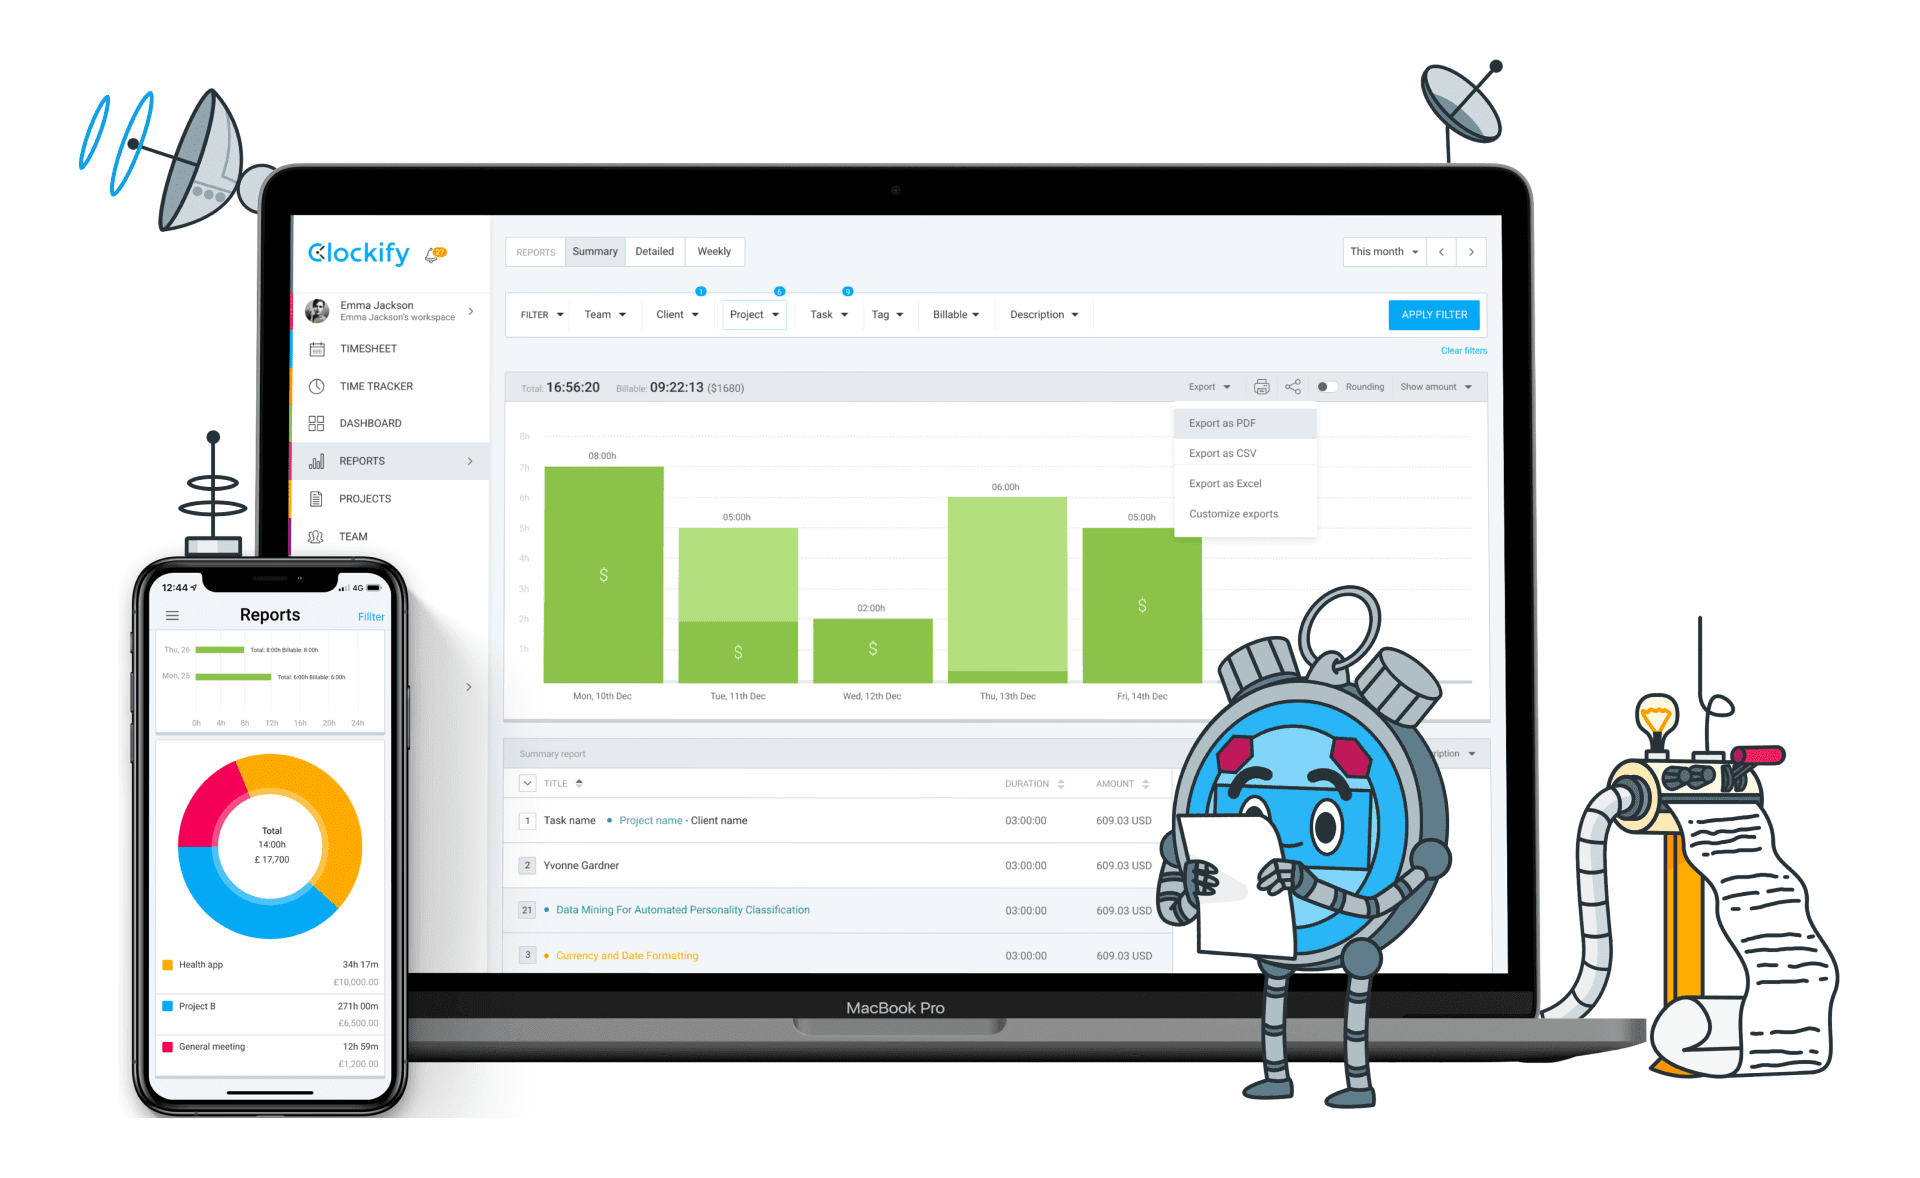
- The Time Tracker allows users to easily log hours manually or use the timer to track time spent on tasks in real time.- The Dashboard provides a comprehensive overview of all tracked time and activities, allowing you to analyze productivity at a glance.- With Reporting, you can customize and export detailed reports to gain deep insights into how your team's time is allocated and identify opportunities for optimization.- The Team Activity feature allows you to monitor your team's current work, promoting transparency and coordination.

Furthermore, consider these Clockify tools:

- Project Management tool helps you efficiently manage your projects and tasks by tracking time spent on each project and ensuring you stay within budget. This tool primarily benefits freelancers or teams that bill by the hour.- The Calendar feature allows for seamless planning and scheduling of tasks, enhancing time management and boosting productivity.- Lastly, Clockify's integrations with popular project management, communication, and productivity applications make it seamlessly fit into your workflow, further enhancing its usability.IDrive Remote Backup

How to set up Clockify for your business

Setting up Clockify for your business is a simple process:

- First, visit the Clockify website and click on the "Sign up for free" button. Provide your business email and create a strong password to create your account.- Once your account is created, you'll be redirected to the Dashboard. Here, you can begin setting up your workspace. Click on the "Add New Workspace" button and enter details like the workspace name and your business's industry.- Next, it's time to invite your team members. Click on the "Invite Team" button and enter their email addresses. They will receive an invitation to join your workspace and can start tracking time once they accept.- Setting up your projects is a crucial step. Click on the "Add New Project" button. Enter the project name, client name (if applicable), and the project budget. You can also set hourly rates for billable hours.- Lastly, navigate to the "Integrations" tab and choose the tools that your business already uses. Clockify seamlessly integrates with various project management, communication, and productivity apps, ensuring a smooth fit into your existing workflow.

Now, you're set up for business using Clockify to help you track time, measure productivity, and enhance your profitability.

Using Clockify to track work hours accurately

Tracking work hours accurately with Clockify is a breeze. Log into your Clockify account and head to the Time Tracker tab. From there, you have two options: use the manual mode to enter hours spent on tasks retroactively or utilize the timer for real-time tracking.

Just start the timer when you begin a task and stop it when you're done. Not only can you monitor hours spent on each task, but you can also specify the project and client associated with it. This guarantees precise logging of billable hours for invoicing purposes.

For even greater accuracy, Clockify's browser extension allows you to start the timer directly from popular online apps like Trello, Asana, and Jira, eliminating the need to switch tabs. This reduces the risk of forgetting to track time.

Remember, accurate time tracking isn't about micromanaging every minute of your day but rather gaining insights into how time is allocated. This invaluable information aids in better project planning resource allocation and ultimately leads to increased productivity and profitability.

Utilizing Clockify to monitor billable hours and project costs

Clockify excels in closely monitoring billable hours and project costs. To get started, navigate to the 'Projects' section in your Clockify account. From there, you can establish billable rates for each project and track the time spent on individual tasks. This information is automatically calculated and presented in a clear, user-friendly format, giving you a precise understanding of the cost of each project.

The 'Reports' feature takes this a step further by providing a comprehensive breakdown of all billable hours. This allows for meticulous invoicing and helps prevent any disputes with clients. You can customize these reports based on time periods, projects, and team members, providing in-depth insights into project performance and profitability.

Clockify's 'Budgeting' feature is also invaluable for managing project costs. You can set a budget for each project, and Clockify will track your expenses in real time. It will alert you when approaching your budget limit, ensuring that cost overruns are avoided and your projects remain profitable.

By utilizing Clockify, you can effectively monitor billable hours project costs and ensure your business is on track to achieve its financial objectives. This powerful tool plays a pivotal role in your project management strategy.

elfsight widgets

Integrating Clockify with other productivity tools

By integrating Clockify with other productivity tools, you can streamline your workflow and boost productivity. Clockify offers various integrations with popular project management, communication, and productivity applications.

For instance, you can seamlessly integrate Clockify with project management tools like Trello, Asana, and Jira. These integrations allow you to start the timer directly from your project management tool, track time spent on tasks, and automatically link this information to the corresponding project or task in Clockify.

Integrating communication tools like Slack or Teams with Clockify enables team members to start timers, track their time, and receive reminders to log hours without leaving the communication platform. Likewise, integrating Clockify with productivity apps like Google Calendar and Outlook lets you plan, schedule, and track time for events or tasks right from your calendar.

To integrate these tools with Clockify, go to the 'Integrations' tab in your Clockify account, select the desired tool, and follow the provided instructions. By integrating Clockify with your existing productivity tools, you can optimize your workflow, ensure accurate time tracking, and maximize your team's productivity.

Tips and tricks for maximizing productivity with Clockify

To optimize your productivity with Clockify, here are some valuable tips and tricks:

- Utilize Keyboard Shortcuts: Clockify supports a variety of keyboard shortcuts that can expedite your time-tracking process. Familiarize yourself with these shortcuts to save time and effort.- Set Time Estimates for Tasks: By assigning time estimates to each task, you can effectively manage your time and focus on achieving your goals.- Harness the Power of Tags: Tags can be used to add additional details to your tracked time. For example, you can use tags like 'Billable', 'Non-Billable', 'Research', 'Meeting', etc. This provides more comprehensive insights when analyzing your reports.- Schedule Regular Reports: Take advantage of Clockify's feature to automatically send weekly or monthly reports to your email. Regular reports inform you about your progress and enable you to adjust your plans accordingly.- Leverage Reminders: Clockify allows you to set reminders to start or stop the timer. These reminders help ensure that no billable hours slip through the cracks.

By implementing these practical tips and tricks, you can fully maximize the capabilities of Clockify and significantly enhance your productivity.

Conclusion:

Clockify goes beyond being a simple time-tracking tool; it is a comprehensive solution that empowers you to effectively manage your projects, track progress, control costs, and boost productivity. With its wide array of features, including real-time tracking, detailed reporting, budgeting, and seamless integrations with other productivity tools, Clockify provides valuable insights into how your time is utilized.

By optimizing your workflow and making informed decisions, you can ensure project profitability by closely monitoring billable hours and avoiding cost overruns. Whether you're a freelancer looking to track billable hours or a large corporation managing multiple projects, Clockify is the ultimate tool that caters to all your needs. In summary, Clockify is an invaluable ally in your quest for enhanced productivity and profitability.

Additional Resources:

https://digitalchowder.com/the-time-tracking-tool-for-increased-productivity/

Friday, September 22, 2023

Time Tracking Tools Compared: Harvest vs. Toggl vs. Clockify

Time Tracking Tools Compared: Harvest vs. Toggl vs. Clockify

Time Tracking Tools Compared

Choosing the right time-tracking tool can help your business be more efficient and make more money. There are lots of options like Harvest, Toggl, and Clockify. We will tell you about each one. They have different features for different types of businesses. You need to figure out which one is best for you. Read this article to make a good decision and help your business improve.

Comparison of Harvest, Toggl, and Clockify

Let us explore the distinctive attributes of each of these tools, delving into their specific features.

- Harvest: Harvest is a helpful tool for tracking your time. It also helps you keep track of expenses and offers reports. It works with other programs like Asana, Trello, and Slack. Freelancers and small businesses can use it on their phones, too.- Toggl: Toggl has an easy-to-use interface and good reporting abilities. It lets you track time over different projects or clients, plus reminds you to log your time when needed. Plus it has a browser extension for logging time from apps quickly.- Clockify: Clockify is free but doesn't have all the features Harvest or Toggl do, like invoicing. But it lets you have unlimited users, tracking, and projects, making it great for any sized team on a budget!

Benefits of Using Each Software

harvest   Harvest

Harvest is great for tracking how you use your time. It is more than just a time tracker. You can also manage projects, expenses, and client billing in one place with Harvest. It has really good reports that can help you make better choices about how to use your time and be more productive.

toggl   Toggl

Toggl is easy to use and fast to learn. This means you don't have to spend a lot of time getting used to the software. It will also count idle time so that all your work minutes are counted. It can also show you reports on how much time was spent on different projects or clients.

clockify   Clockify

Clockify is perfect for businesses that want to track time without paying extra money. It can work with more people and projects as your business grows, without costing you any extra. It may not have some of the special features other tools have, but it still does a great job of tracking time.

Comparing Features of Harvest, Toggl, and Clockify

Each of these time-tracking tools possesses distinct features that set them apart:

1. Time Trackingharvest  
Harvest

Harvest is a tool that helps you track how much time you spend on different tasks. It has a timer that you can start and stop whenever you need to. You can also enter the amount of time manually, which makes it great for all kinds of schedules.

toggl   
Toggl

Toggl is a tool that helps you easily track your time. You can use it for different tasks and projects. It has a special feature that will remind you to turn off the timer if you forget, so that your time tracking will be exact.

clockify   
Clockify

Clockify helps you keep track of how much time you spend on projects or tasks. You can press one button to start and stop the timer, or enter the time in manually. Clockify is helpful for businesses of all sizes since you can use it to track as many projects and tasks as needed.

2. Invoicing & Billingharvest   
Harvest

Harvest stands out with its powerful invoicing and billing capabilities. It not only tracks your time but also converts it into professional invoices. You can create detailed invoices based on the tracked time and expenses, which can be sent directly to your clients from the tool. Harvest supports Stripe and PayPal for payments, giving your clients multiple payment options.

toggl
Toggl

Unlike Harvest, Toggl does not offer an in-built invoicing feature. However, it does provide seamless integrations with invoicing and billing software like QuickBooks and Xero. You can easily export your time data to these platforms for invoicing and billing purposes.

clockify
Clockify

Clockify, like Toggl, does not come with a built-in invoicing feature. However, it allows you to generate detailed reports of your tracked time, which can be exported in various formats and used for invoicing on other platforms. Clockify supports integration with different project management and accounting software, making the invoicing process relatively seamless.

3. Reports & Analytics
Harvest

Harvest helps you understand where your team's time is going. It shows you trends, so you can make decisions based on the data. Harvest gives visual reports about how long tasks take and who worked on them. You can also save this information for later use.

Toggl

Toggl's reporting feature is really important. It helps you see how much time you spend on different tasks and projects. You can customize the reports to show the time spent in a certain period, by team members, clients, and tags. The reports look nice and can be saved as PDFs or CSVs.

Clockify

Clockify is a free tool that lets you keep track of the time you spend on different projects, tasks, clients, and team members. You can then use this information to make detailed reports and filter them based on what you need. The reports can be exported in different formats so that you can look at the data more closely.

Key Differences Between Each Software Provider

While all three tools - Harvest, Toggl, and Clockify - offer robust time tracking, they differ in critical ways:

- Harvest has a lot of features that help you manage projects. But it also costs a lot of money, so it might not be the best option for small businesses or those who cannot spend much money.- Toggl is easy to use and can help your team get started quickly. But it does not have a way to make invoices, so you will need to find another program or website that can do this for you.- Clockify is free and lets you track how much time you spend doing things, how many people are working on something, and what projects you're working on. But Clockify doesn't have all the features that other programs have like invoices or billing. So you might need to use another program for those things.

Pros & Cons of Each Software Provider

harvest
HarvestPros- Comprehensive project management solution with integrated invoicing and billing features.- Advanced reporting and analytics provide deep insights into team performance and resource allocation.- Supports multiple payment options like Stripe and PayPal.Cons- Charges per user can make it expensive for smaller businesses or those on a tight budget.- The advanced features may require a learning curve for some users.

toggl

TogglPros- It offers simplicity and ease of use, making it quick to set up and begin tracking time.- Robust reporting features provide detailed insights into time usage.- Idle detection feature ensures accurate tracking of time.Cons- Lacks an in-built invoicing feature, necessitating other software or integrations for billing purposes.- Some users may find the interface too simplified for complex project management.

clockify

ClockifyPros- Unlimited users, time tracking, and projects at no cost making it ideal for businesses on a tight budget and large teams.- Robust reporting and analytics features provide detailed insights into team performance and productivity.- Supports integration with a wide array of project management and accounting software.Cons- Lacks some advanced features like invoicing and billing, which may necessitate using other software for these needs.- The interface may not be as intuitive as other tools, potentially requiring a learning curve for some users.

Which One is Best for You & Your Business Needs

When choosing the best time-tracking software for your business, consider how many people are on your team, how much money you have to spend, and what features are essential.

Harvest is an excellent choice if you need project management help and billing features, but it might be too expensive for small teams.

Toggl is easy to use and has detailed reports, but does not include invoicing.

Clockify is free, but you may still need other software for invoicing. The best choice will depend on what your business needs.

In conclusion, the best software will depend on your business needs and resources. Try each option and consider how well they integrate with your current workflow before deciding.

Additional resources related to iDrive and other cloud storage solutions:

Article: How Clockify Can Help with Your Work and Billable Hours
Video: Clockify: The Time Tracking Tool You Need for Increased Productivity


https://digitalchowder.com/time-tracking-tools-compared-harvest-vs-toggl-vs-clockify/

10 Smart E-Commerce strategies to Increase Your E-Commerce Sales

Increase Your E-Commerce Sales If you need help to increase your e-commerce sales despite putting in much effort, you're not alone. With...